17 Photoshop Tutorials for Product Photography: The Ultimate List
Add shadows, change backgrounds, and remove unwanted objects from your photos with these Photoshop tutorials.
By

Adobe Photoshop can turn almost any lifeless photo into a money-making asset. And with a nearly endless number of possibilities when it comes to making your edits, there’s a TON to learn about how to make the most of Photoshop.
Wondering how to learn Photoshop for free? We put together this list of the best Adobe Photoshop tutorials to learn what you can do in Photoshop to make shots shine. Use the table of contents here to navigate or scroll down to read through them all:
Easy Photoshop tutorials for beginners
1. Beginner’s guide to using Layers
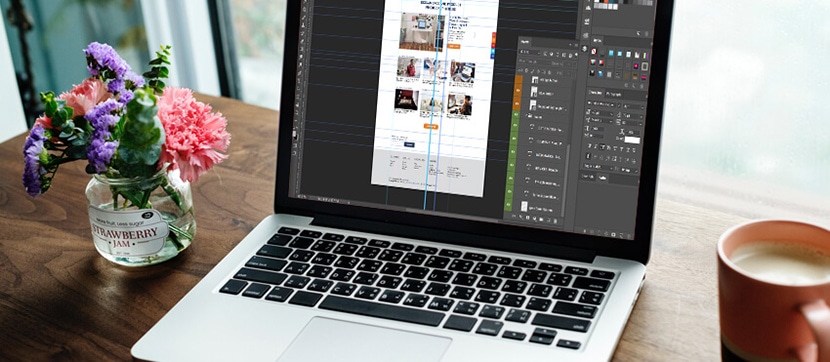
Using Layers will streamline your photo-editing process and keep you organized. But if you’re first starting out or you’re reacclimating yourself to the software after some time apart, it can be confusing to get started. This Photoshop Layers for beginners guide will help you get started.
2. Photoshop tools for beginners
Photoshop has tons of tools to help you achieve different effects. Before you start editing, you need to learn which tools will help you do what. This tutorial looks at how to customize the Toolbar in Photoshop and how to use each tool, with examples.
3. Create a transparent background in Photoshop
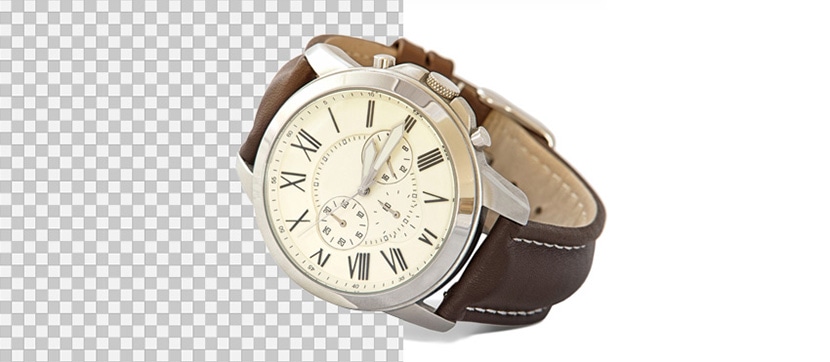
Transparent backgrounds mean you can use your product photos across the web and in print collateral. For example, a transparent background gives you the ability to place your product against a background that dynamically changes colors. On responsively designed sites, a featured product with a transparent background can interact differently with its background depending on the user’s screen size.
Using Photoshop to create a transparent background, and then saving the file in the appropriate web-ready format, is easy with this tutorial.
4. How to replace the background with the Magic Wand Tool

Looking to swap out the background for a different scene? Learn how to select and mask in Photoshop with the Magic Wand Tool.
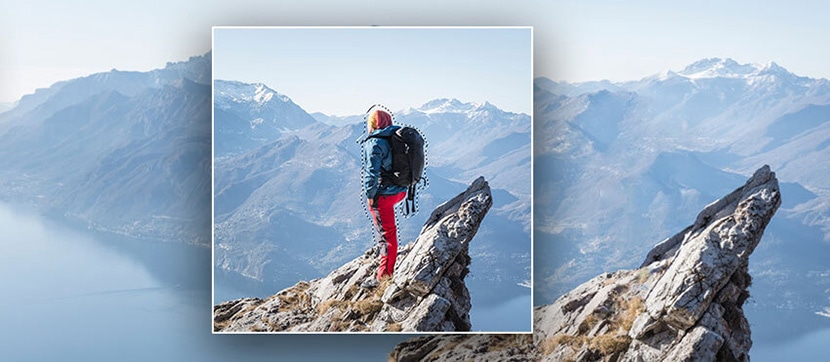
5. How to use the Pen Tool to edit product photos
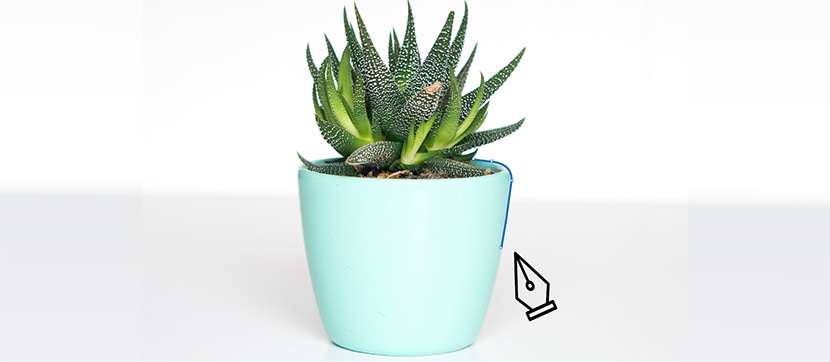
The Pen Tool in Photoshop creates paths and shapes which can be duplicated and manipulated to create complex selections, masks and objects. This step-by-step tutorial will show you how to use the Pen Tool to remove the background from your product photos.
6. How to remove unwanted objects from your photo
Catch something you don’t want in the frame? Instead of scheduling (and paying for) a reshoot, learn how to remove unwanted objects with image-editing software like Photoshop. This tutorial includes bonus how-tos for GIMP and other programs too.
Best intermediate Photoshop tutorials
1. Change the background color
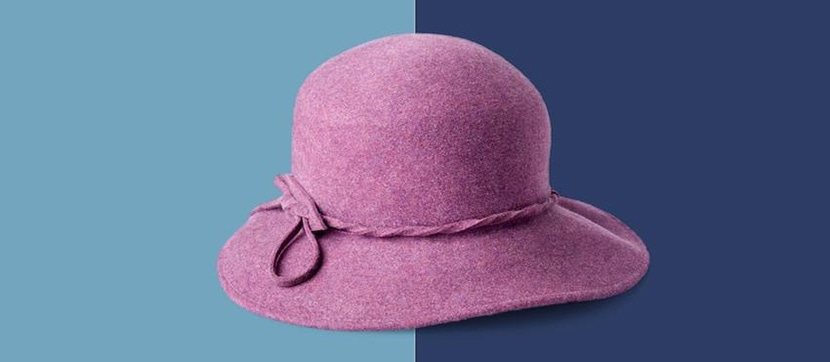
Rather than removing your background (or putting an invisible cloak on it), some situations call for a new background color. This allows you to repurpose photos and add pop and color to your shots. This tutorial also goes a step further by showing you how to automate the process using Photoshop actions.
2. 10 steps to do the Photoshop face swap
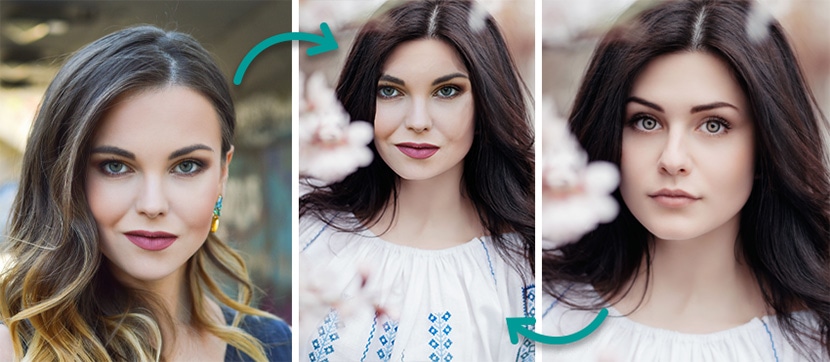
Change face — literally — with this tutorial that will show you how to swap faces with another photo or model. (Hint: This can also help when you have grumpy child models who refuse to smile for the shot.)
3. How to change the sky color

You can’t control the weather on shoot day, but this tutorial will show you how to turn any day into a bluebird sky day. Or create different, surreal effects with red, orange, green, and purple skies. All you need is to know how to change the sky color in Photoshop — and you’ll learn that right here.
4. Add smoke and fog to product photos
Spooky fog isn’t just for Halloween — there are tons of reasons why you’d want to add a smoky effect to your product shots for dramatic effect. Harnessing this element may seem challenging at first, but there are actually a few ways you can create a fog effect for your product photos — one of those involves Photoshop.
5. Remove the background from an image with hair

When you’ve got a human, animal, or product with fur or hair, edits can get tricky. You can waste time and ruin your images if you do it incorrectly. In this Photoshop tutorial, you’ll walk away knowing how to remove hair from a white background with the Background Eraser Tool.
6. Create simple lighting effects in Photoshop

Lighting is everything for product photography. Learn how to fix lighting, change the color of lighting and create spotlight and lens flare effects on your product photos. This tutorial is super detailed and gives you four different manipulation techniques to add lighting effects to your shots.
7. Make reflections in Photoshop

Adding a reflection in Photoshop makes your photos come alive. Learn the simple steps to create the illusion that your products are sitting on reflective glass or sitting in a clear pool of water.
Free Photoshop tutorials for advanced users
1. Create a realistic drop shadow in Photoshop
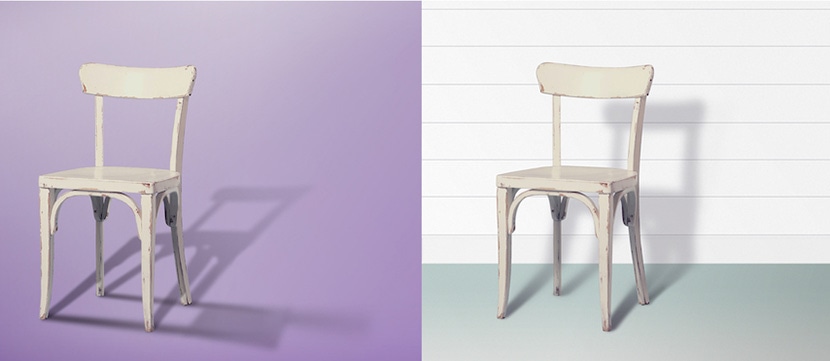
Drop shadows only add appeal to your photos if they’re realistic. When you don’t have the correct lighting to achieve the shadows you need, you can use Photoshop. Find out how to add natural-looking shadows to your product photos — in a process that takes time, skill and an understanding of how shadows work.
2. Turn a picture into a line drawing
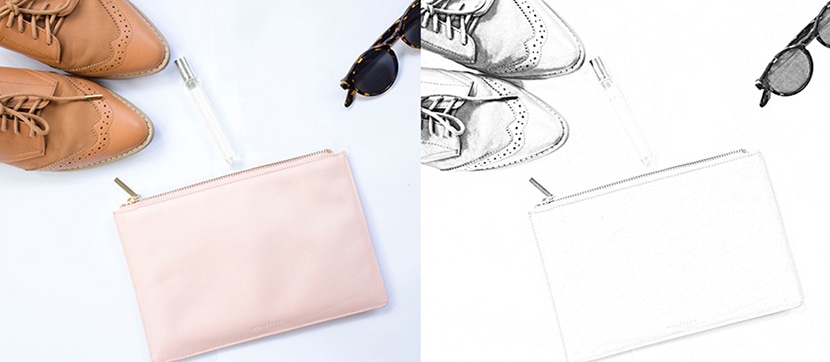
Illustrations can enhance the style and appeal of your ecommerce site and engage your audience on social media. Learn how to turn a picture into a line drawing in this free Photoshop tutorial. Images of objects isolated on a white background work best for this technique, making this a great option for modifying or enhancing product photos.
3. How to retouch product photos to fix blemishes and smudges
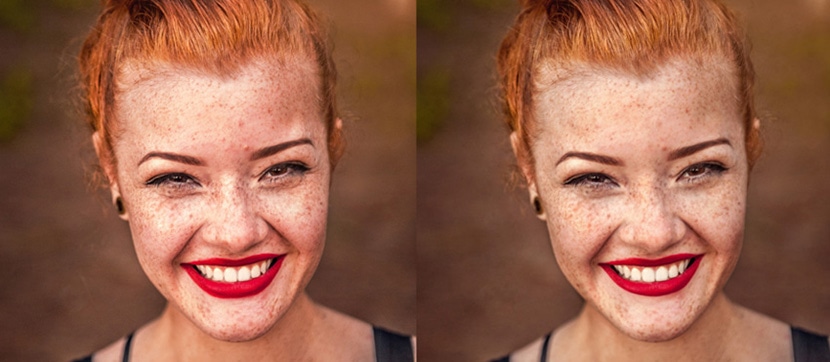
Skin retouching in Photoshop without causing a face to look fake or “plasticky” is no easy feat. But you can use it to fix blemishes, smooth skin, refine lines and even change the shape of a person’s face. Check out how.
4. How to add a ghost mannequin to product photos
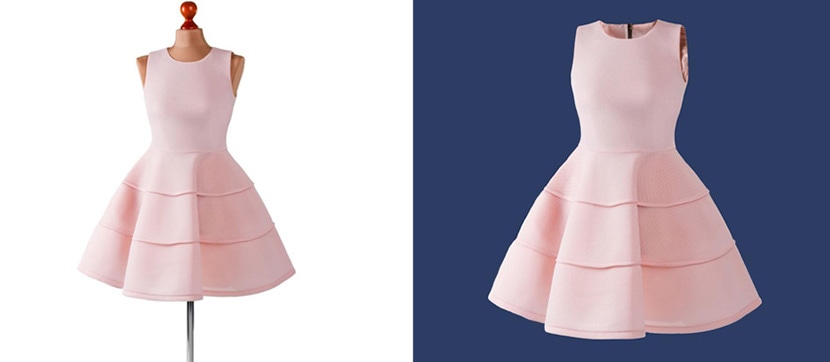
No budget for human models? You still need to give apparel dimension and show it would look on a person. Add a ghost mannequin in Photoshop following the steps in this tutorial.
Check out more Photoshop-related content