How to Swap Faces in Photoshop in Just 10 Easy Steps
Learn how to swap faces in Photoshop and extend the life of your product photos.
By

In this article
- Step 1: Open image files in Photoshop
- Step 2: Select the second model’s face
- Step 3: Copy and paste the second model’s face
- Step 4: Resize the face
- Step 5: Duplicate your Background Layer
- Step 6: Make a selection in the Body layer
- Step 7: Create a slight overlap of the face with the body
- Step 8: Delete the face from the body layer
- Step 9: Blend everything together
- Step 10: Perform touch-ups (if necessary)
- FAQs about Photoshop face swap
The Photoshop face swap is a photo editing technique that allows you to take the face of one person and put it onto another person’s body using Photoshop. The Photoshop face swap technique is especially useful for ecommerce brands that want to make the most of their product photography investments.
There are many reasons you’d want to change a face in Photoshop, including:
- Adding variety to the models featured in your product photos (remember, consumers like to see people who look like them)
- Using a shot where everything but the model’s face was in the right position
- Making an unhappy or angry child happy again
In this article, we’ll learn how to face swap and blend in Photoshop in just 10 easy steps.
Watch the video here or scroll down below for the written tutorial.
Step 1: Open image files in Photoshop
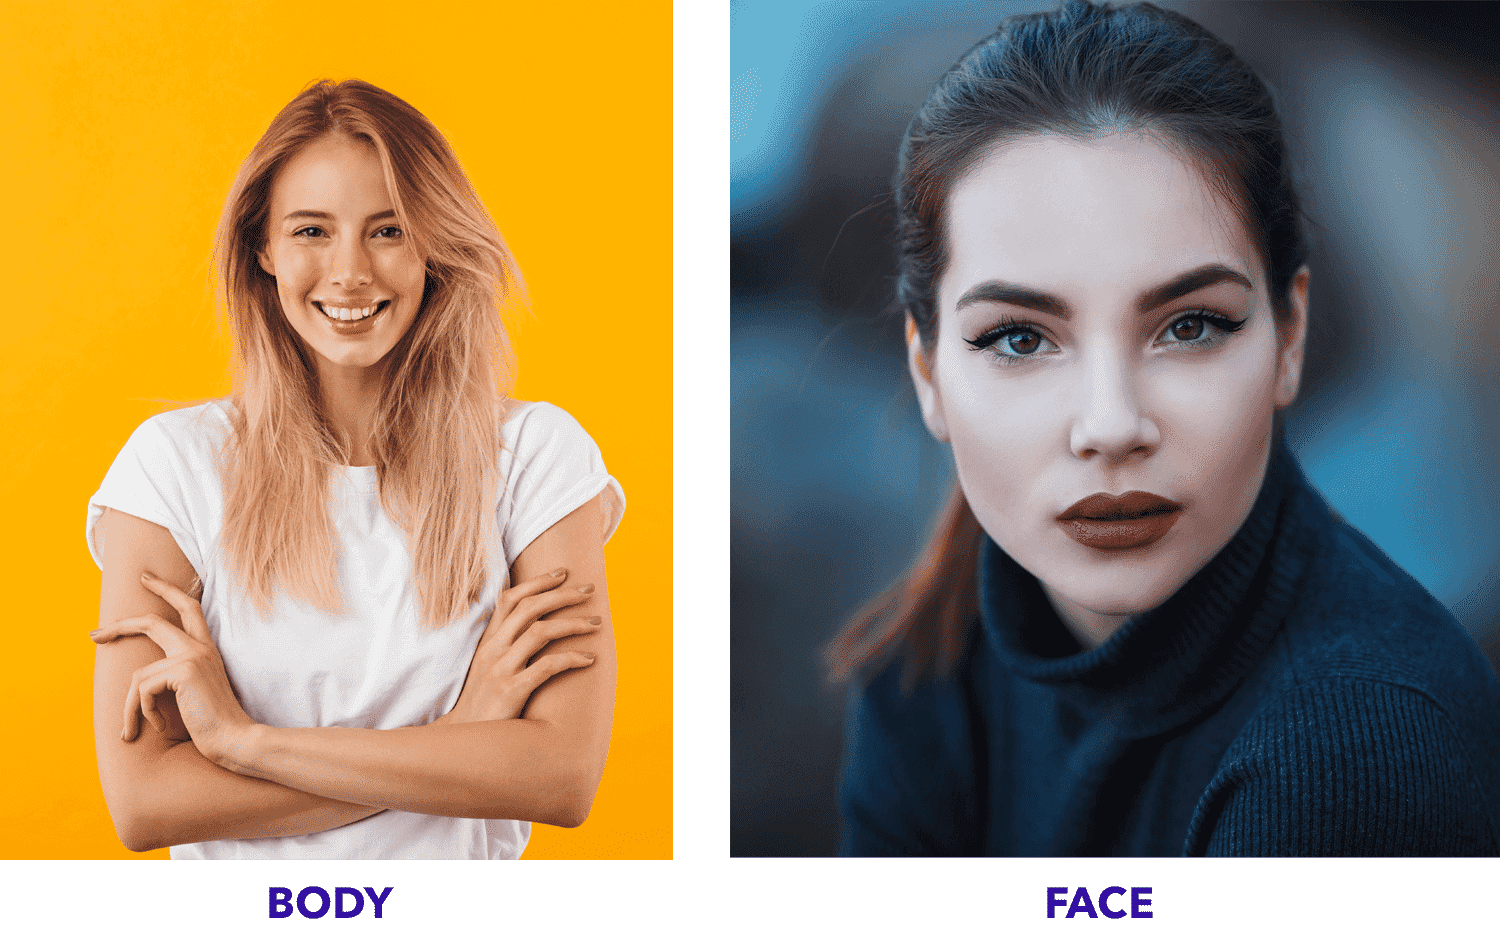
Before you can begin the face swap Photoshop technique, you’ll need to select the photos you want to work with. For best results, choose two photos where the models are looking in the same direction. Also, pay attention to the location of shadows on both models’ faces. The easiest photos to work with will have minimal shadows and soft lighting.
We’ll use the following two images in this tutorial:
Open both images in Photoshop by clicking CTRL+O (COMMAND+O on Mac) or selecting File > Open from the dropdown menu at the top of the application window.
Since we’re learning how to photoshop someone’s face onto another body, we’ll refer to the photo with the yellow background—the first model—as “Body” and the photo with the blue background—the second model—as “Face.”
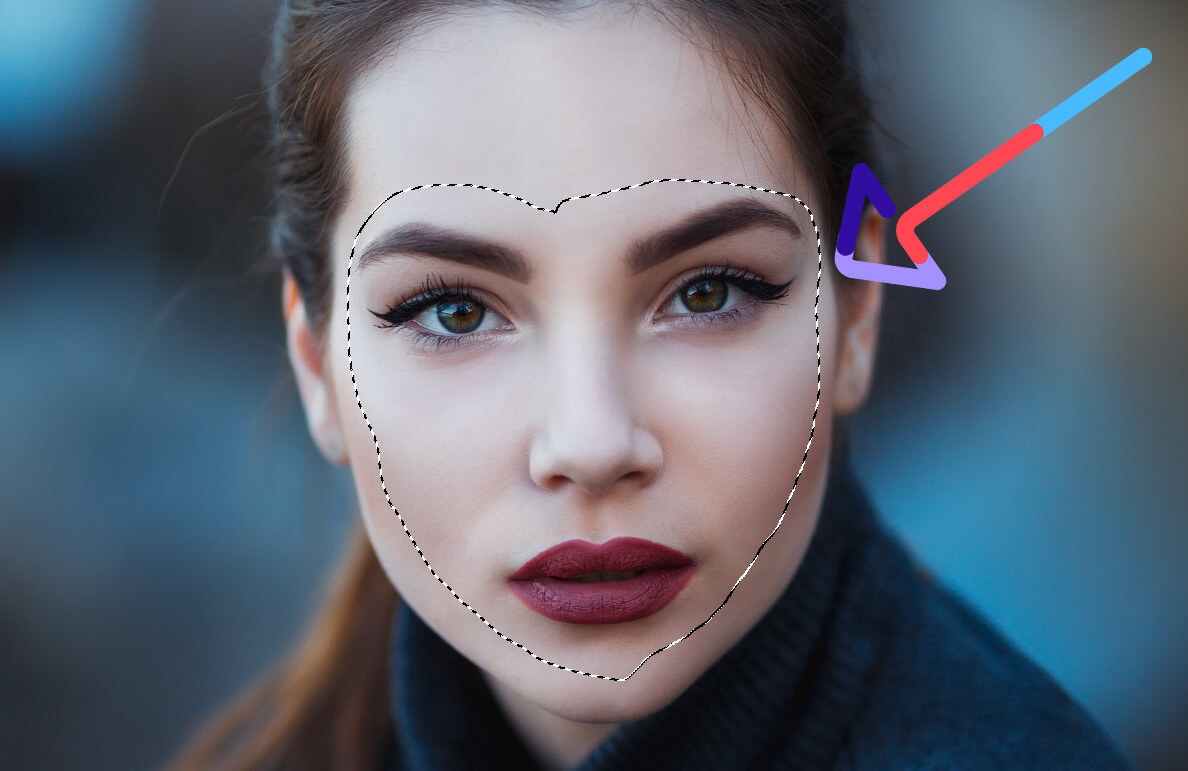
Step 2: Select the second model’s face
We’ll begin working with the Face photo. In the Face photo, ensure you are on the layer containing the model’s face. If you are working in a JPG, the file is flattened and you will be on the correct layer by default. However, if your file is a layered Photoshop file, you need to select the correct layer in the Layers panel.

Once in the correct layer, choose the Lasso tool from the Toolbar on the left side of the application window.

If you don’t see the Lasso Tool in the Toolbar, it may be hiding behind the Polygonal Lasso Tool or the Magnetic Lasso Tool. Click and hold on either of these tools if you see them to reveal the Lasso Tool.
Draw a rough outline around all the important features of the model’s face that you want to swap onto the other face. This may be just the eyes, nose, and mouth, but also consider cheekbones, eyebrows, and any distinguishing features such as moles. Do not select any of the model’s hair.
Step 3: Copy and paste the second model’s face
You should now see a dashed marquee line (known fondly as marching ants) around your selection. Choose CTRL+C (COMMAND+C on Mac) to copy the selection of the face. Alternatively, you can choose Edit > Copy from the dropdown menu at the top of the application window.
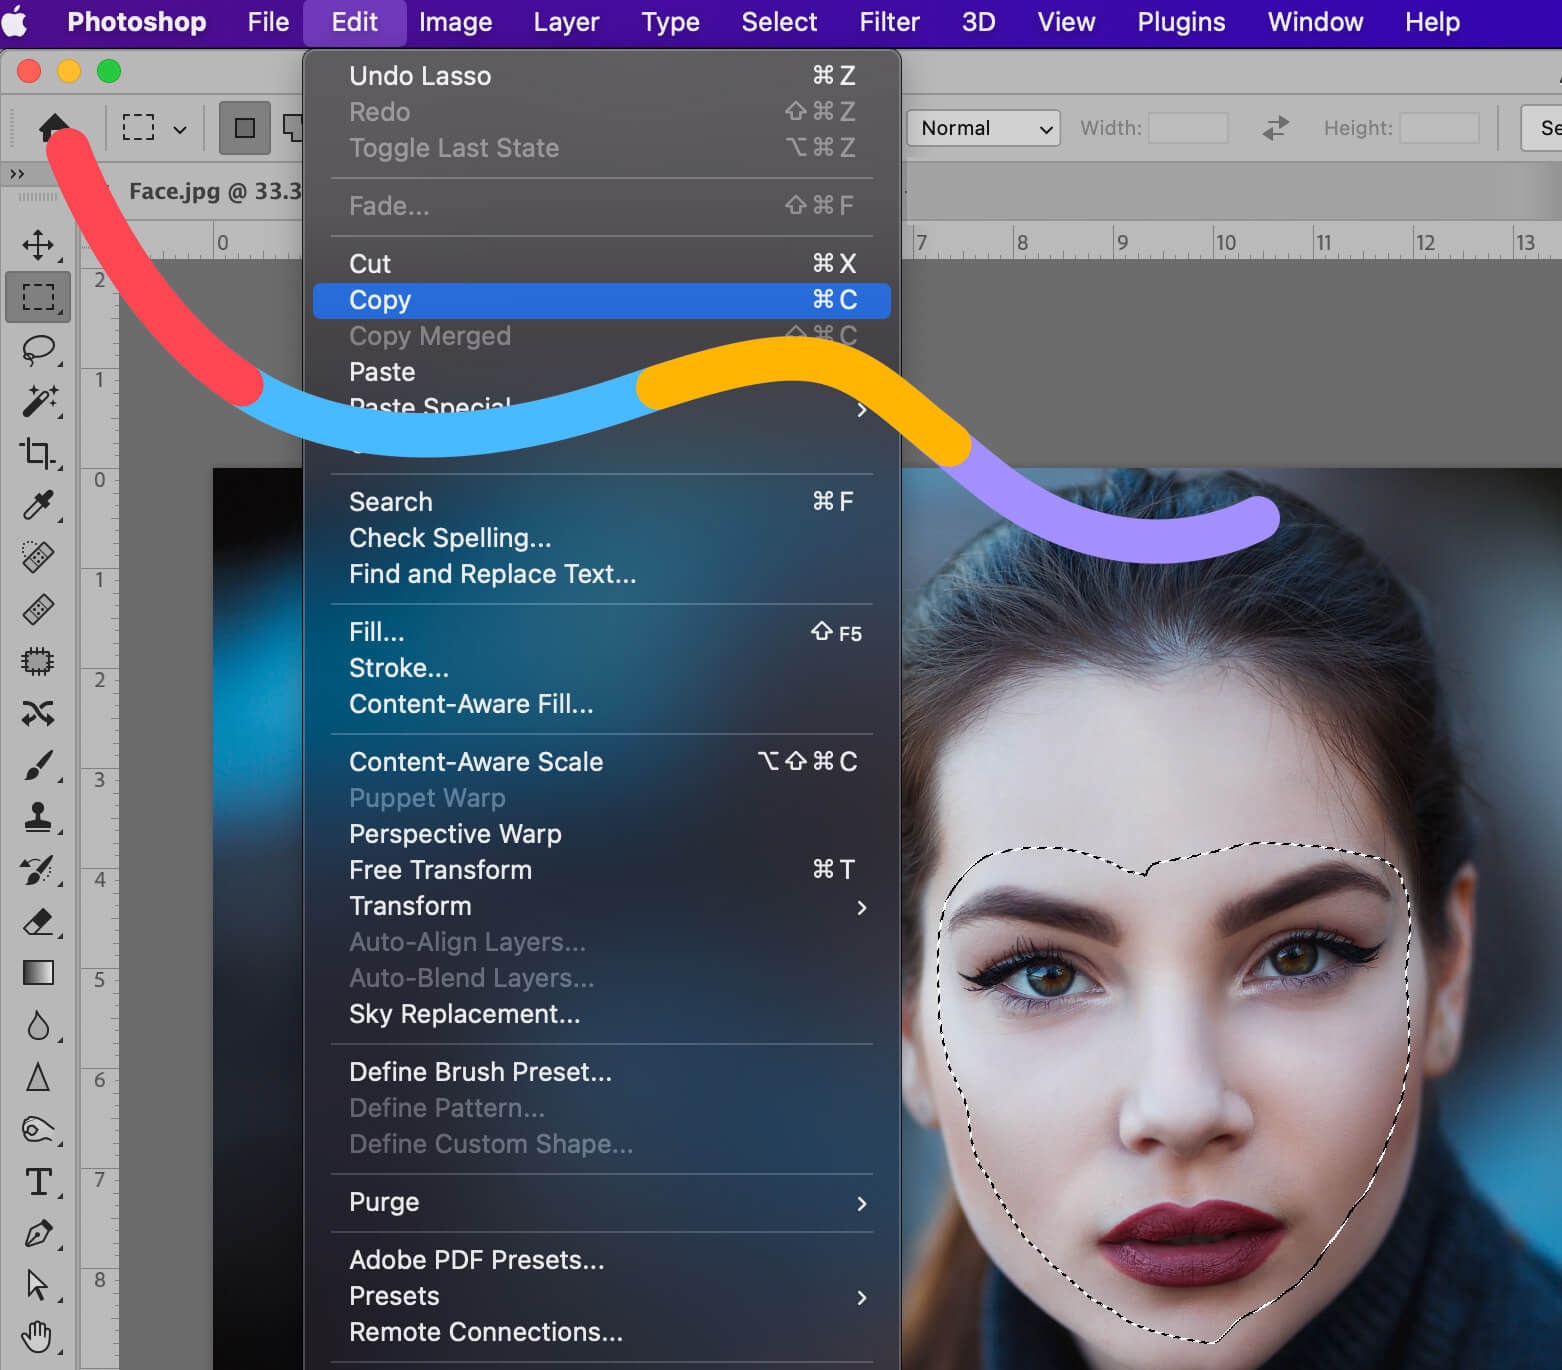
Next, we’ll move into the Body photo. In the Body photo, paste the selection you made from the other photo by typing CTRL+V (COMMAND+V on Mac) or choosing Edit > Paste from the dropdown menu.
Don’t worry about it looking bad right now. We’ll be learning how to blend faces in Photoshop in just a minute.
Using the Move Tool in your Toolbar, move the new face so that it is roughly in the same place as the face you’ll swap faces with in Photoshop.
Step 4: Resize the face
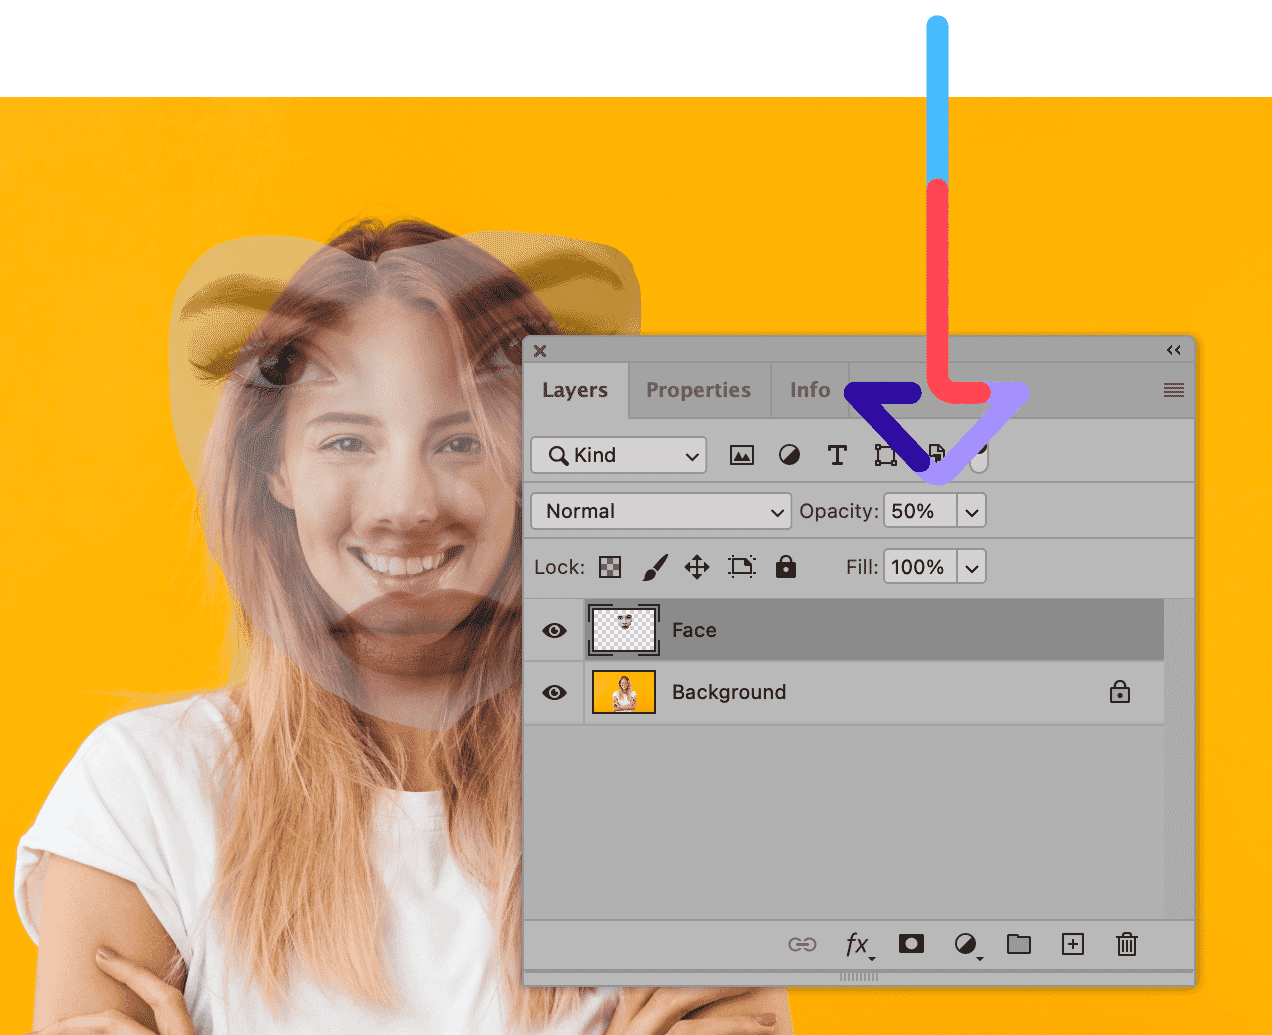
Make sure your Layers panel is visible. If you don’t see it, you can bring it to the forefront of your screen by selecting Window > Layers from the dropdown menu.
In the Layers panel, make sure the new layer with the face from the Face image is selected. Rename this layer to “Face” by double-clicking on the name of the layer until it becomes available to edit.
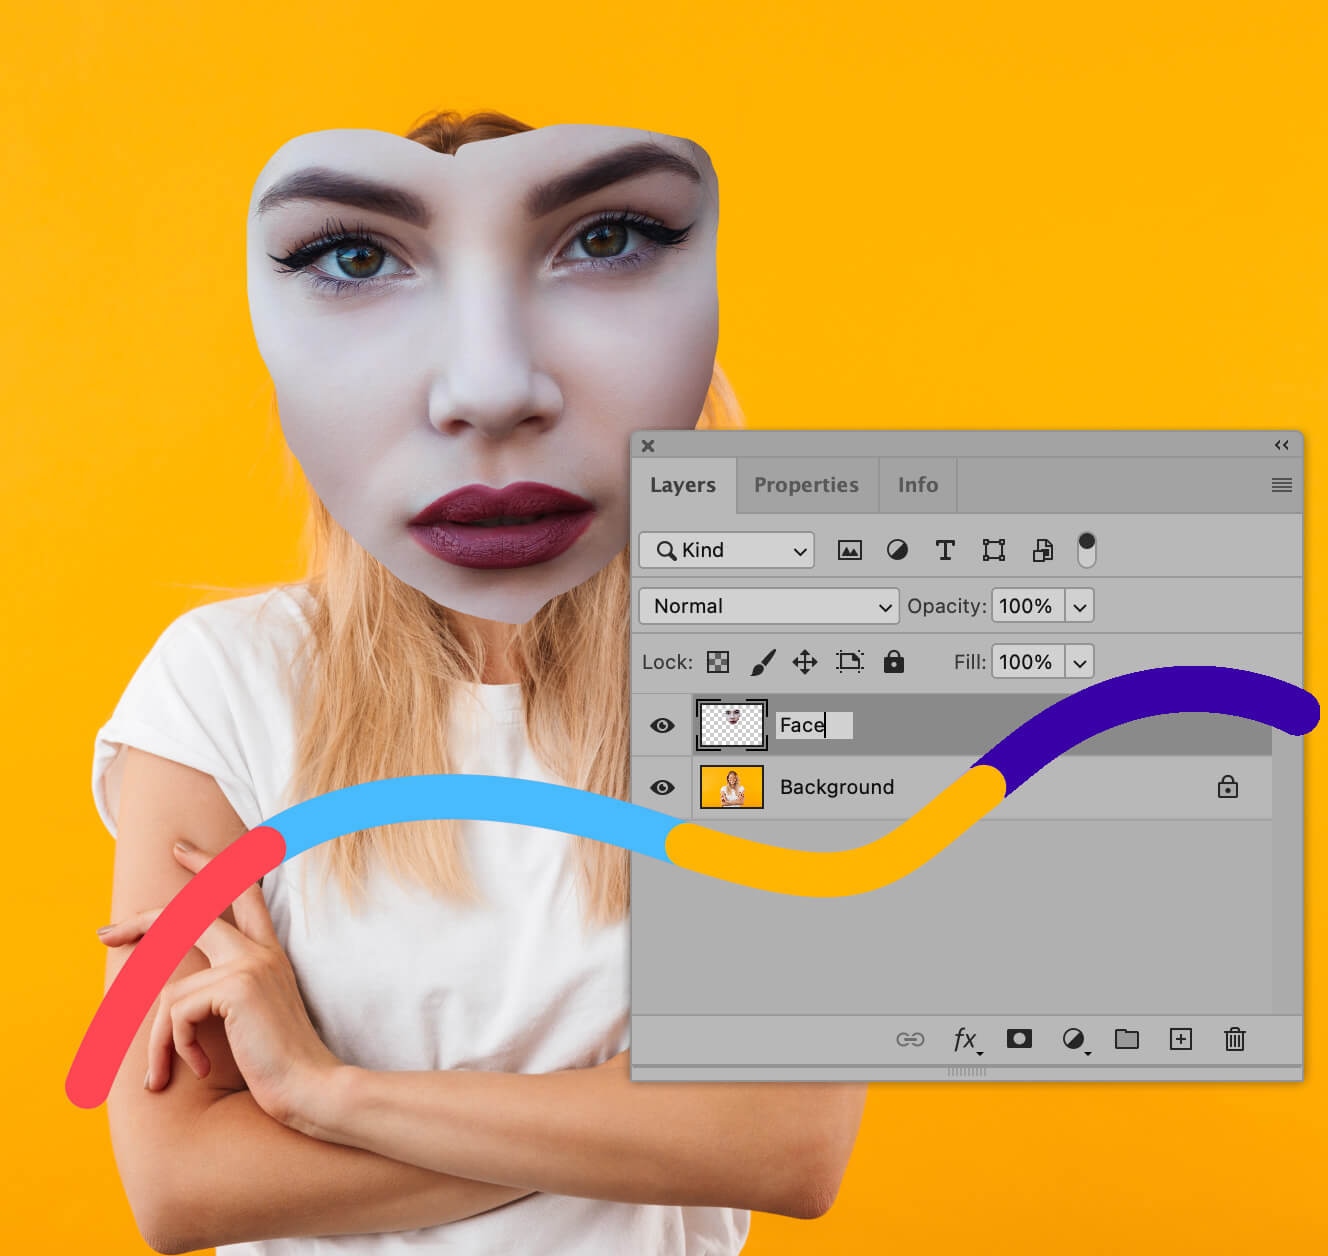
Next, reduce the opacity of this layer to 50%. You can now see the features of both faces to swap in Photoshop.
In the dropdown menu at the top of the screen, select Edit > Transform > Scale.
You’ll see a box around the face. Place your cursor at one of the corners of the box, hold down the SHIFT key, and drag the corner until the new face is the same size as the face underneath. Since you are working in reduced opacity, you should be able to line up the eyes, nose, and mouth as you resize the face.
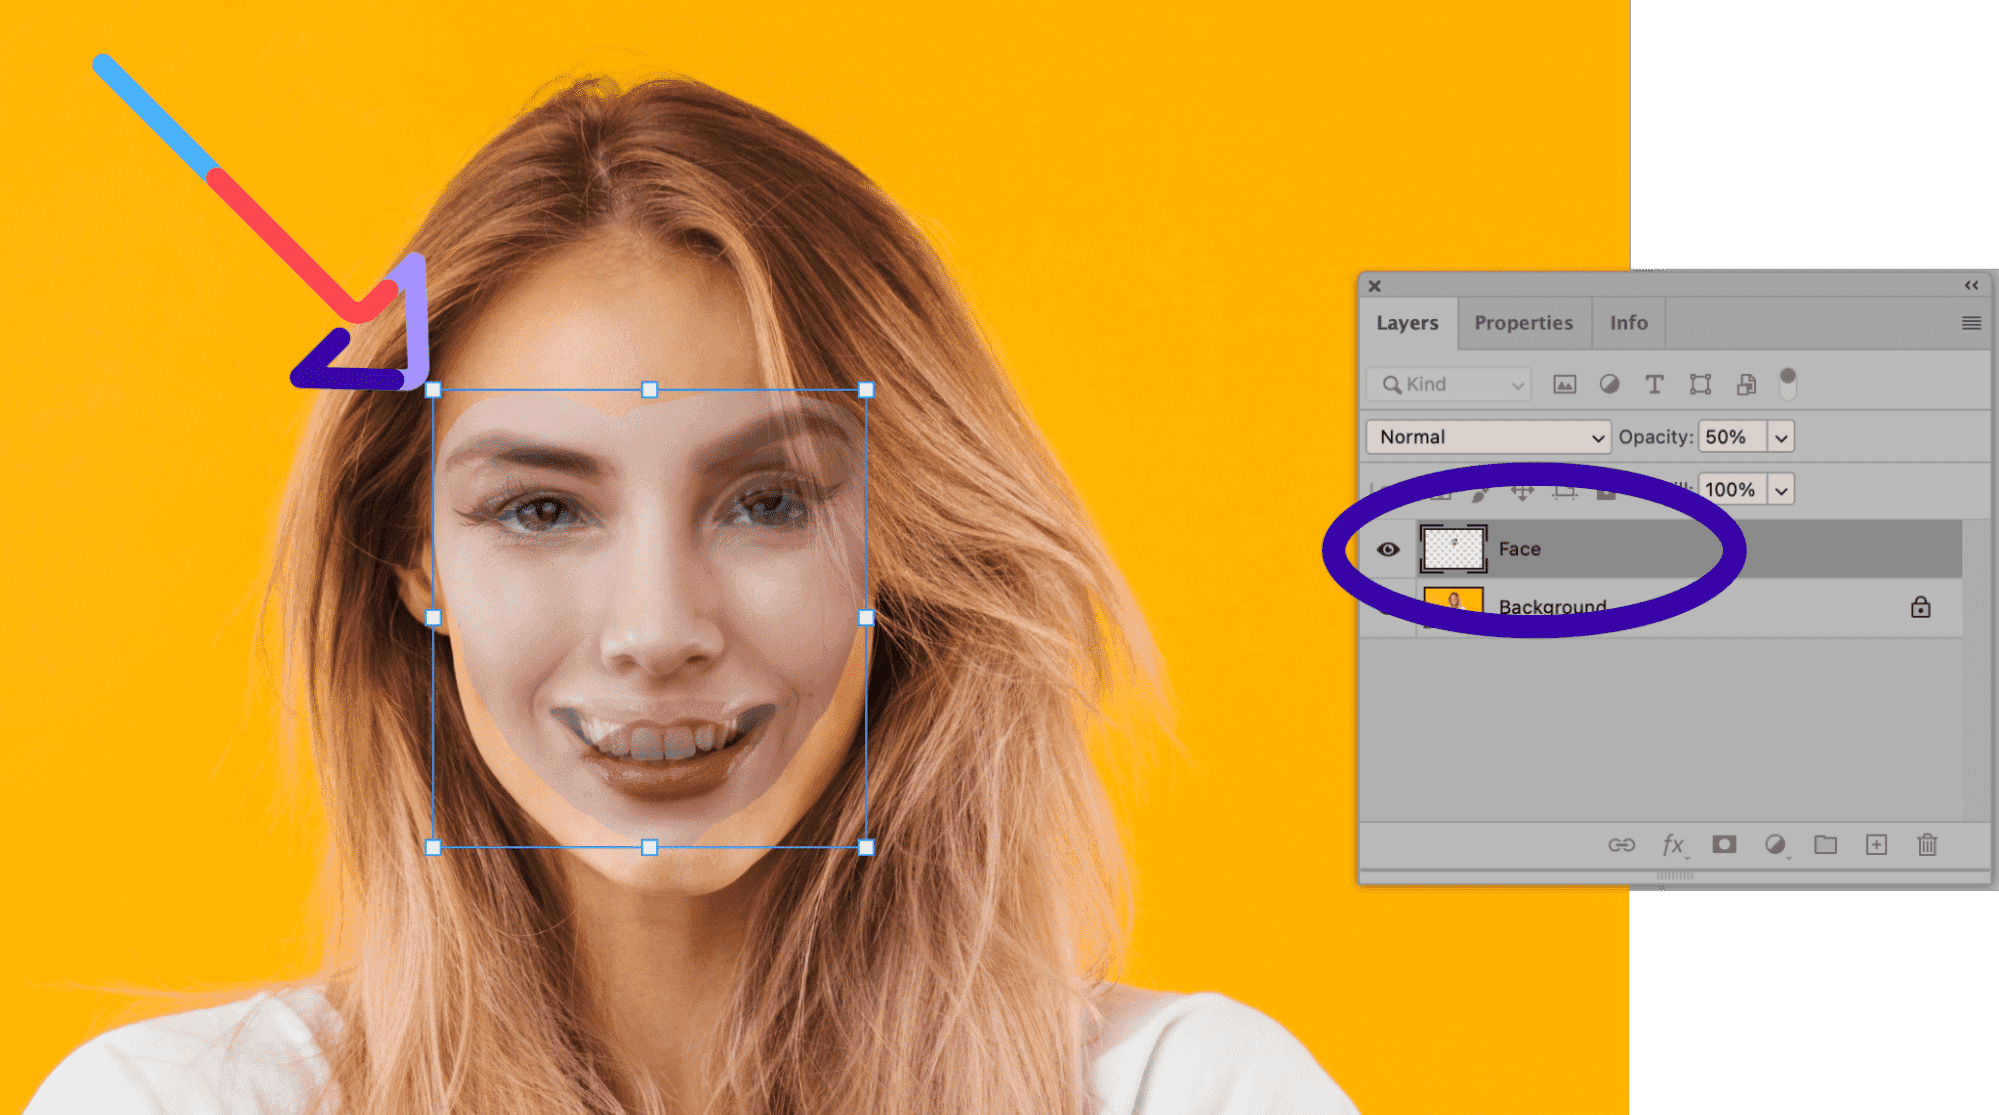
Hit ENTER (RETURN on Mac) when you’re satisfied with the resizing.
If you need to rotate the face, select Edit > Transform > Rotate from the dropdown menu and rotate the face until it lines up correctly.
No two faces will line up exactly, so you’ll need to use your own judgment here as to what size and rotation works best.
Again, remember to hit ENTER (RETURN on Mac) when you’re done so Photoshop knows to make the rotation permanent.
Reset the opacity of your Face layer to 100%.
Step 5: Duplicate your Background Layer
The Photoshop face swap technique is a destructive process, so we need to duplicate our background layer before we go any further just so we can retain our original image for touch-ups.
To duplicate the background layer, select the layer containing the first model’s body (if you originally started with a JPEG or flattened layer, this will be a locked layer called Background).
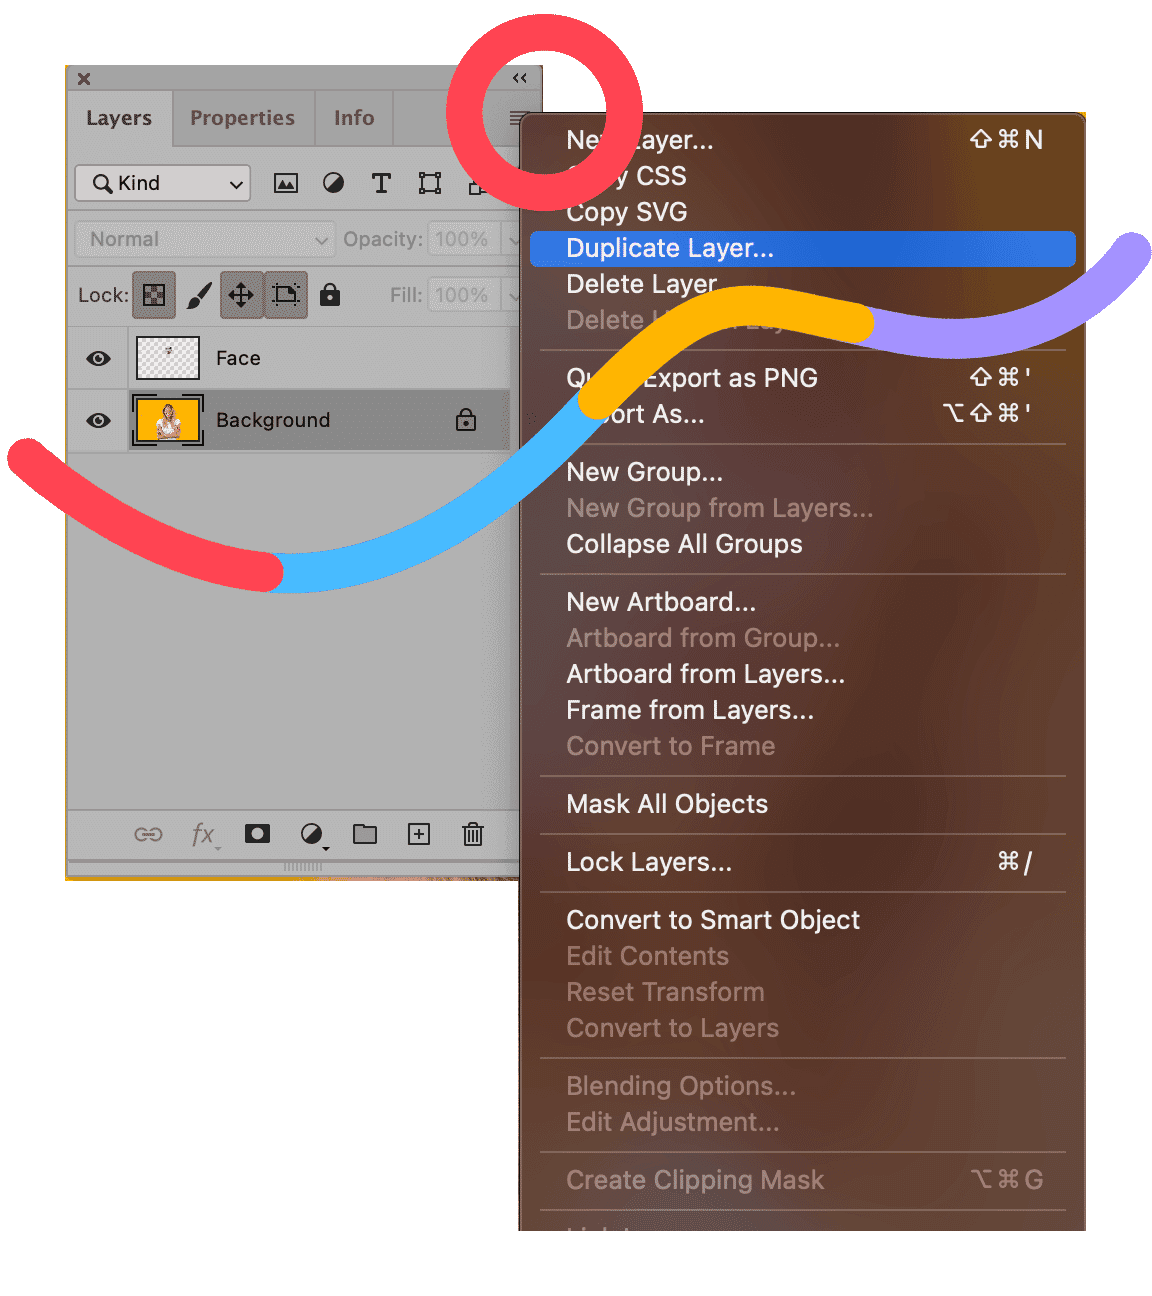
Look for the small block of four horizontal lines at the upper left corner of the Layers panel. This is your Layers panel menu. Click on those lines to pull down the Layers panel options.
From the dropdown, select Duplicate Layer….
Alternatively, you can type CTRL+J (COMMAND+J on Mac) to duplicate the layer without needing to access the Layers menu.
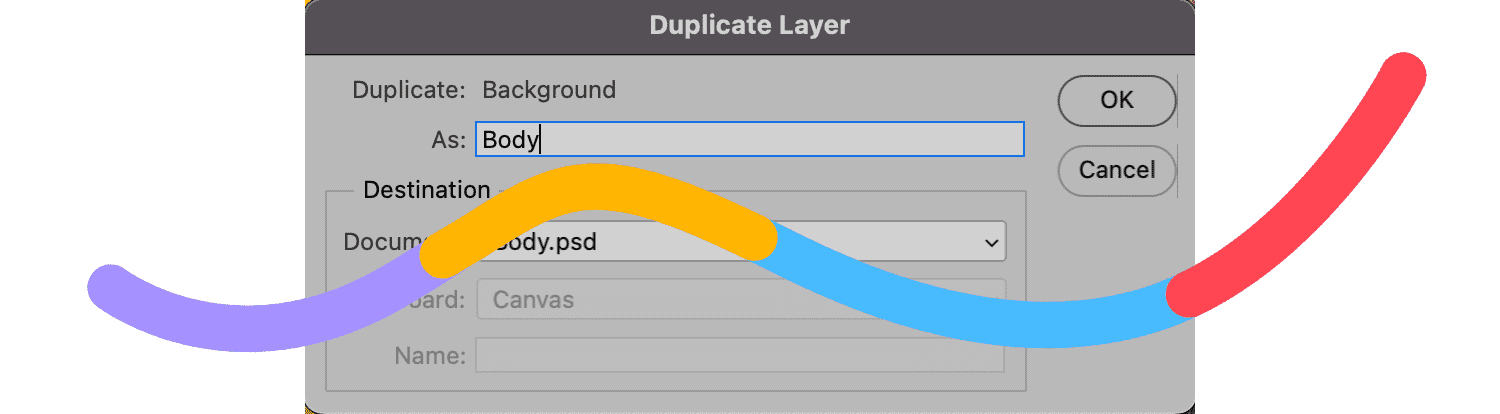
In the pop-up window, name the new layer “Body.”
Back in the Layers panel, click on the button that looks like an eye just to the left of the Background layer. This will toggle the layer’s visibility off.
Step 6: Make a selection in the Body layer
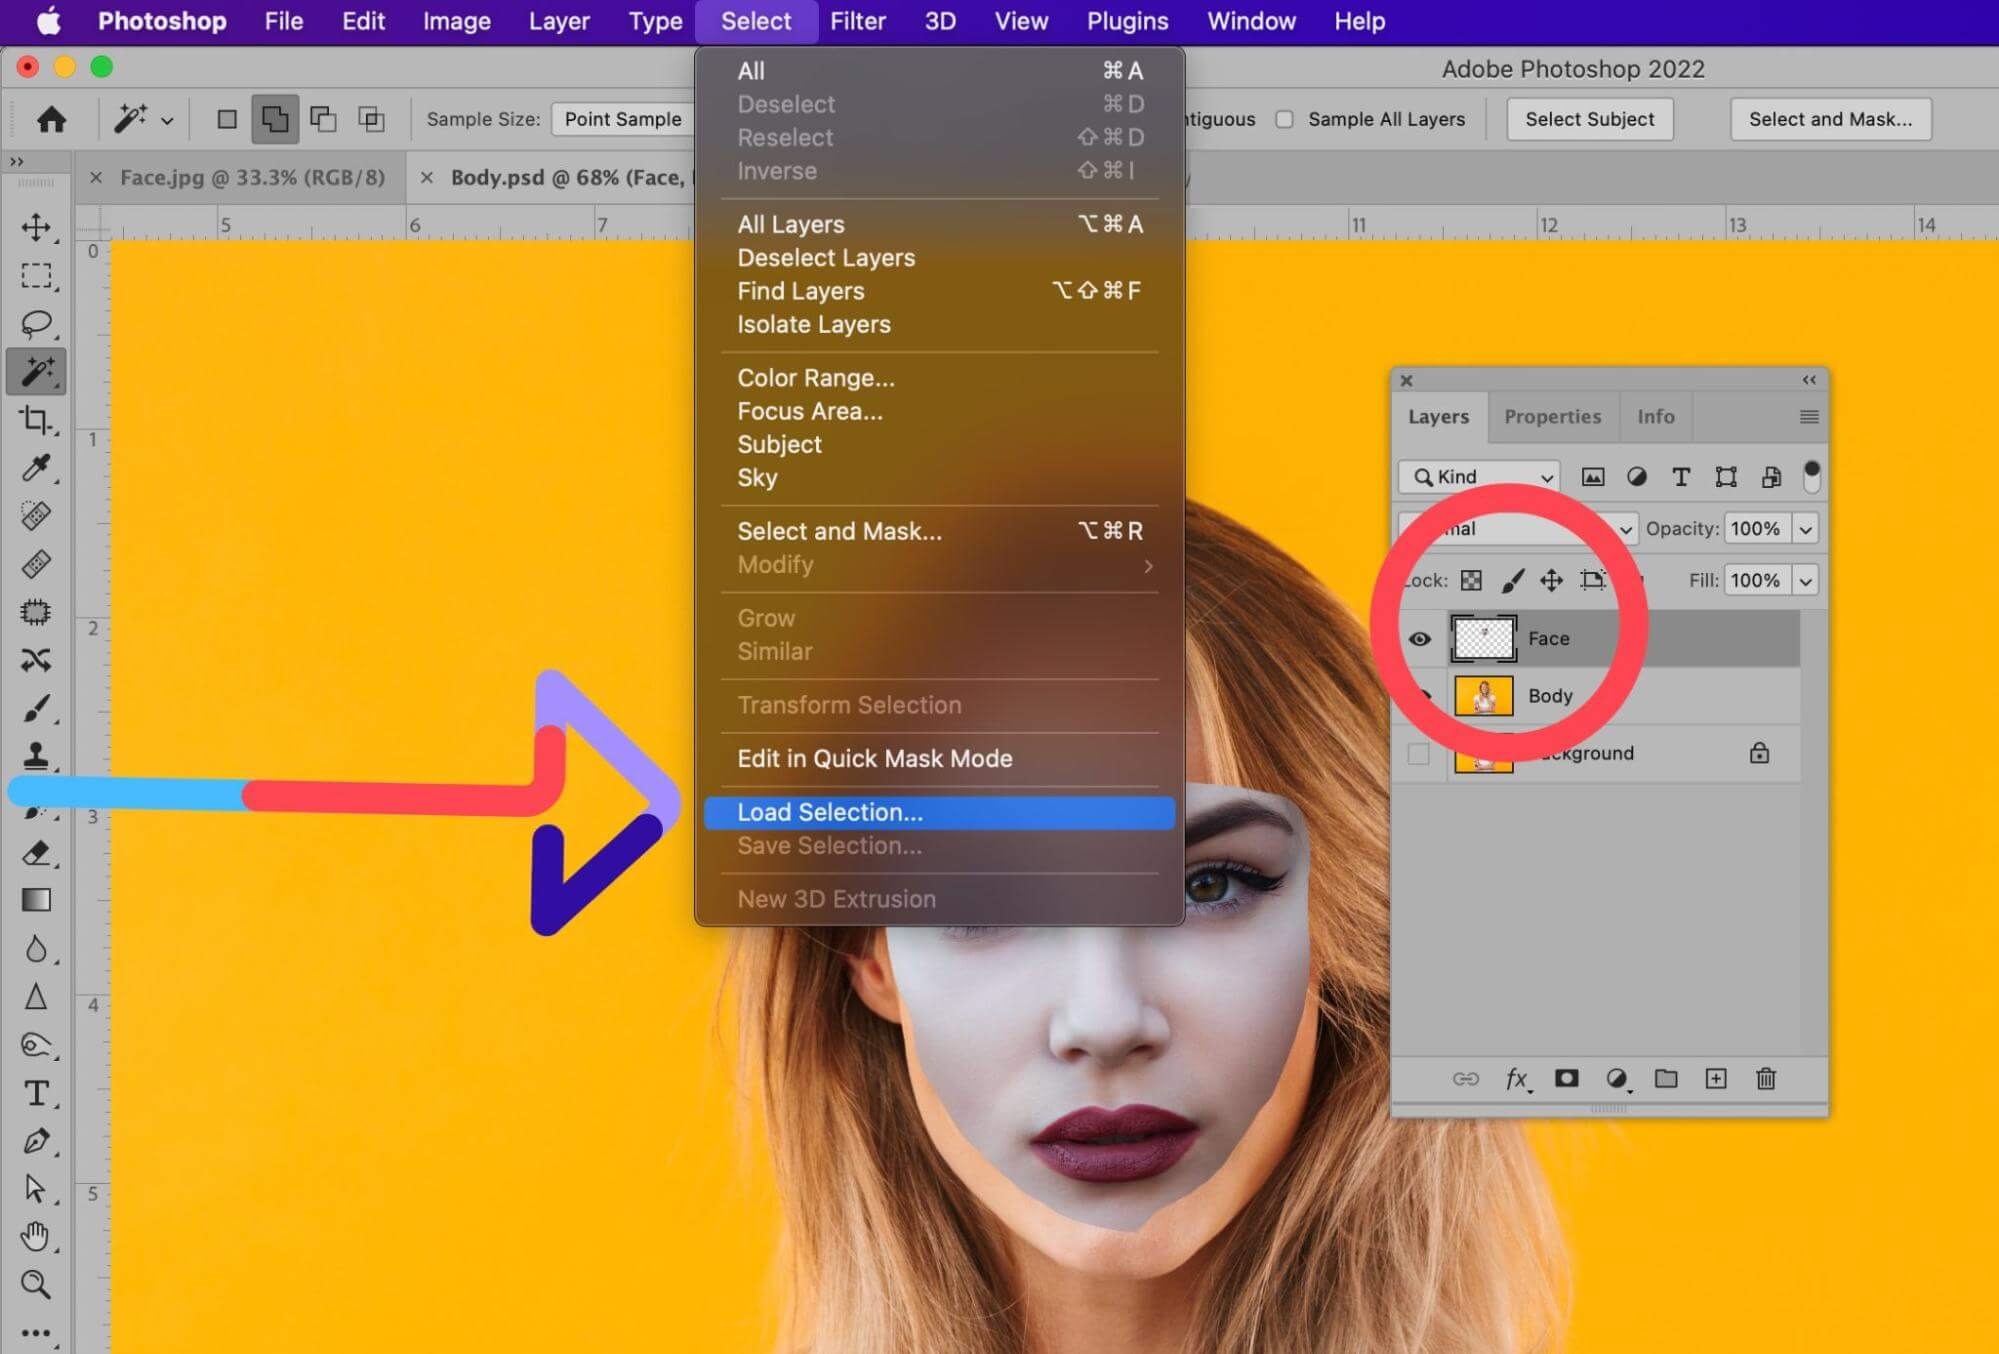
In the Layers panel, select the Face layer. Then, from the dropdown menu at the top of the screen, choose Select > Load Selection.
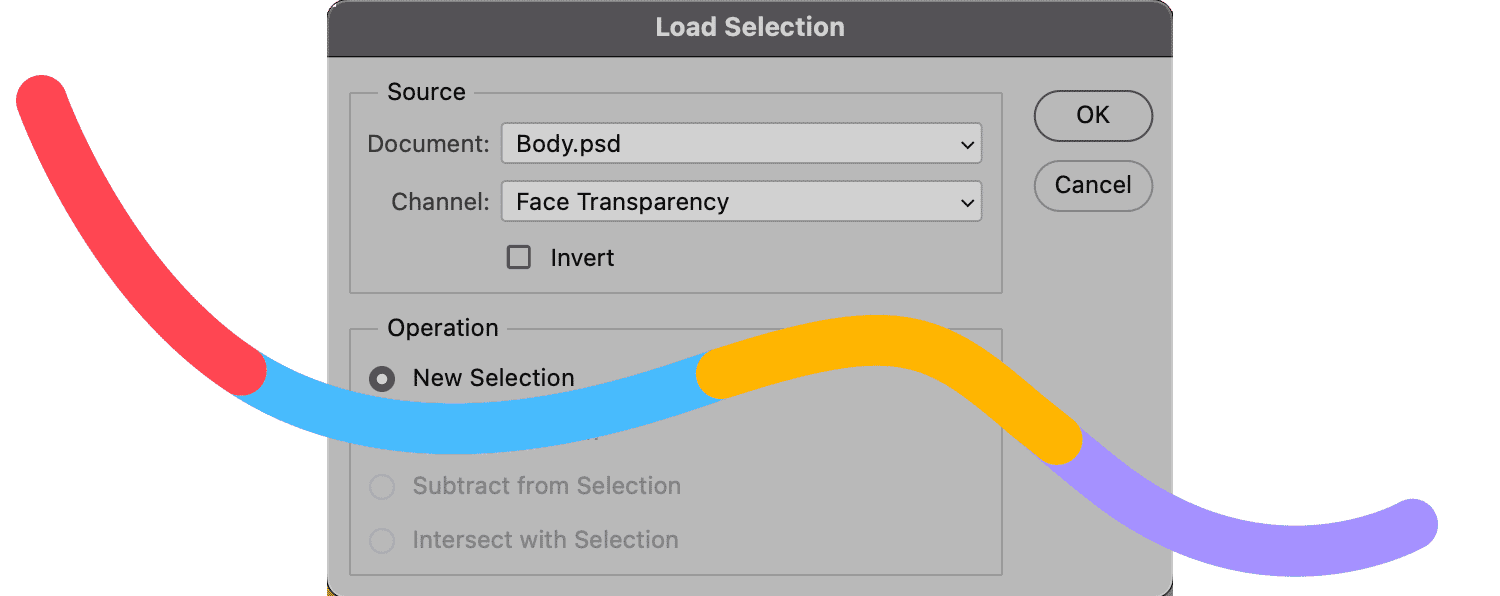
A pop-up window will appear. In it, the channel should say “Face transparency.” Underneath Channel, make sure the box next to Invert is unchecked.
The radio button next to “New Selection” should be selected.
Click OK.
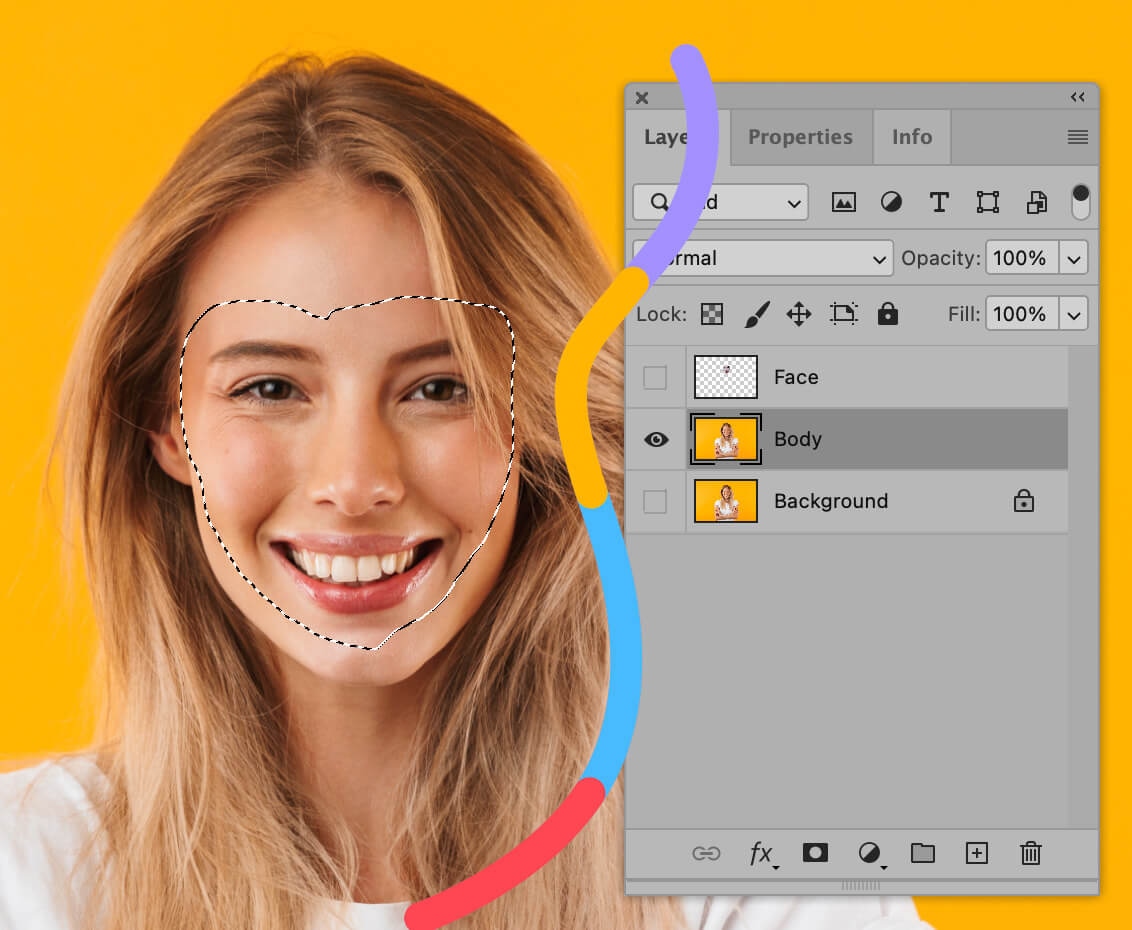
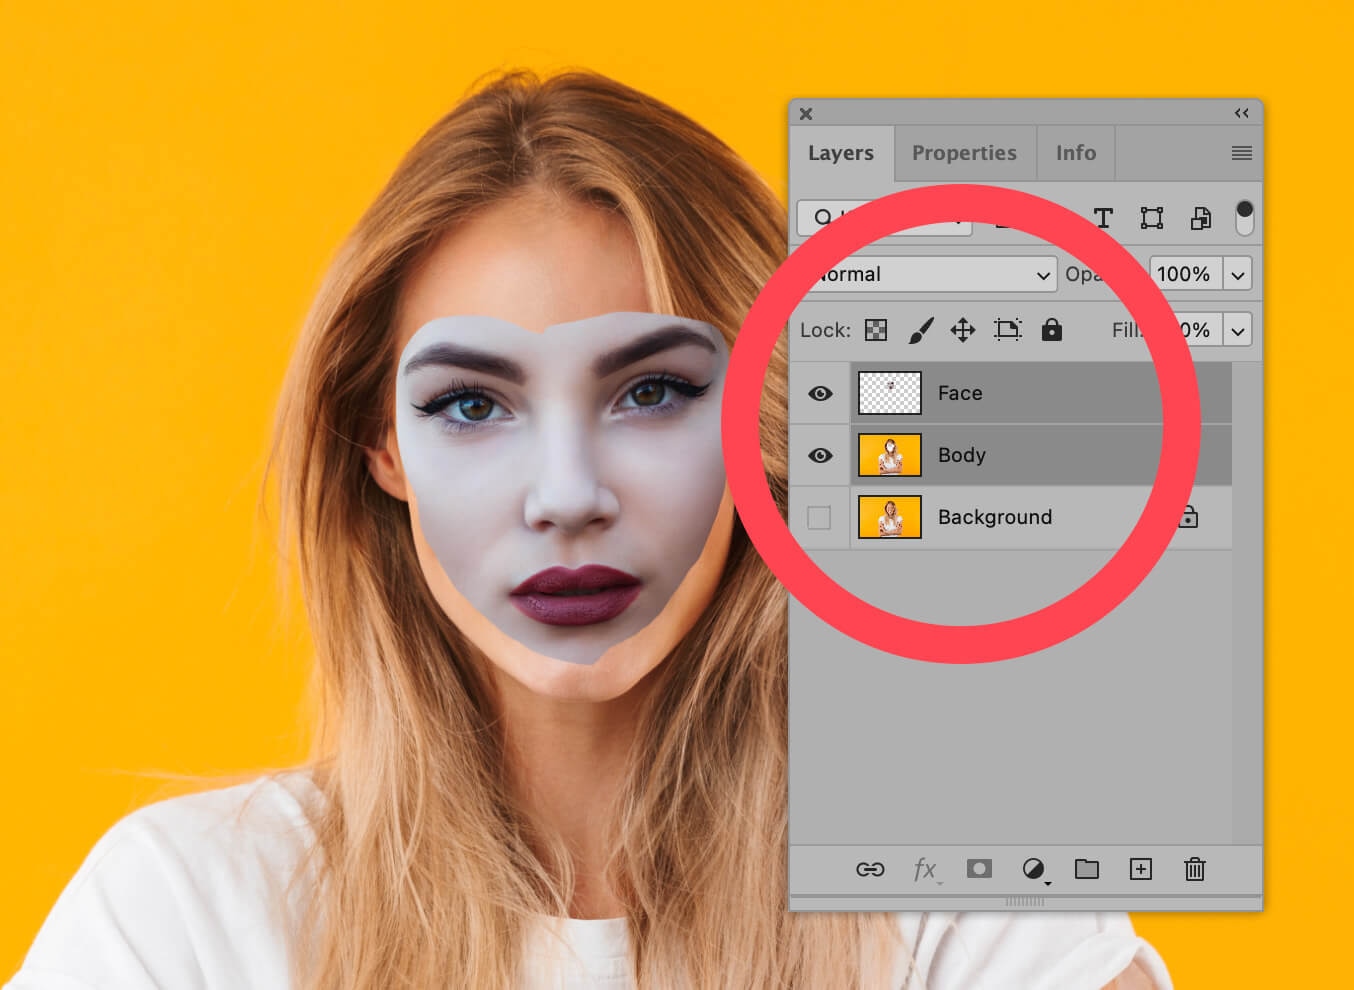
Back in the Layers panel, click on the eye icon next to the Face layer to make the new face invisible. DO NOT deselect your selection, though. We’ll be using that selection in the next step.
Step 7: Create a slight overlap of the face with the body
Next, select the Body layer in the Layers panel.
From the dropdown menu, choose Select > Modify > Contract.

In the pop-up menu that appears, set the contract amount to 10 pixels. Click OK.
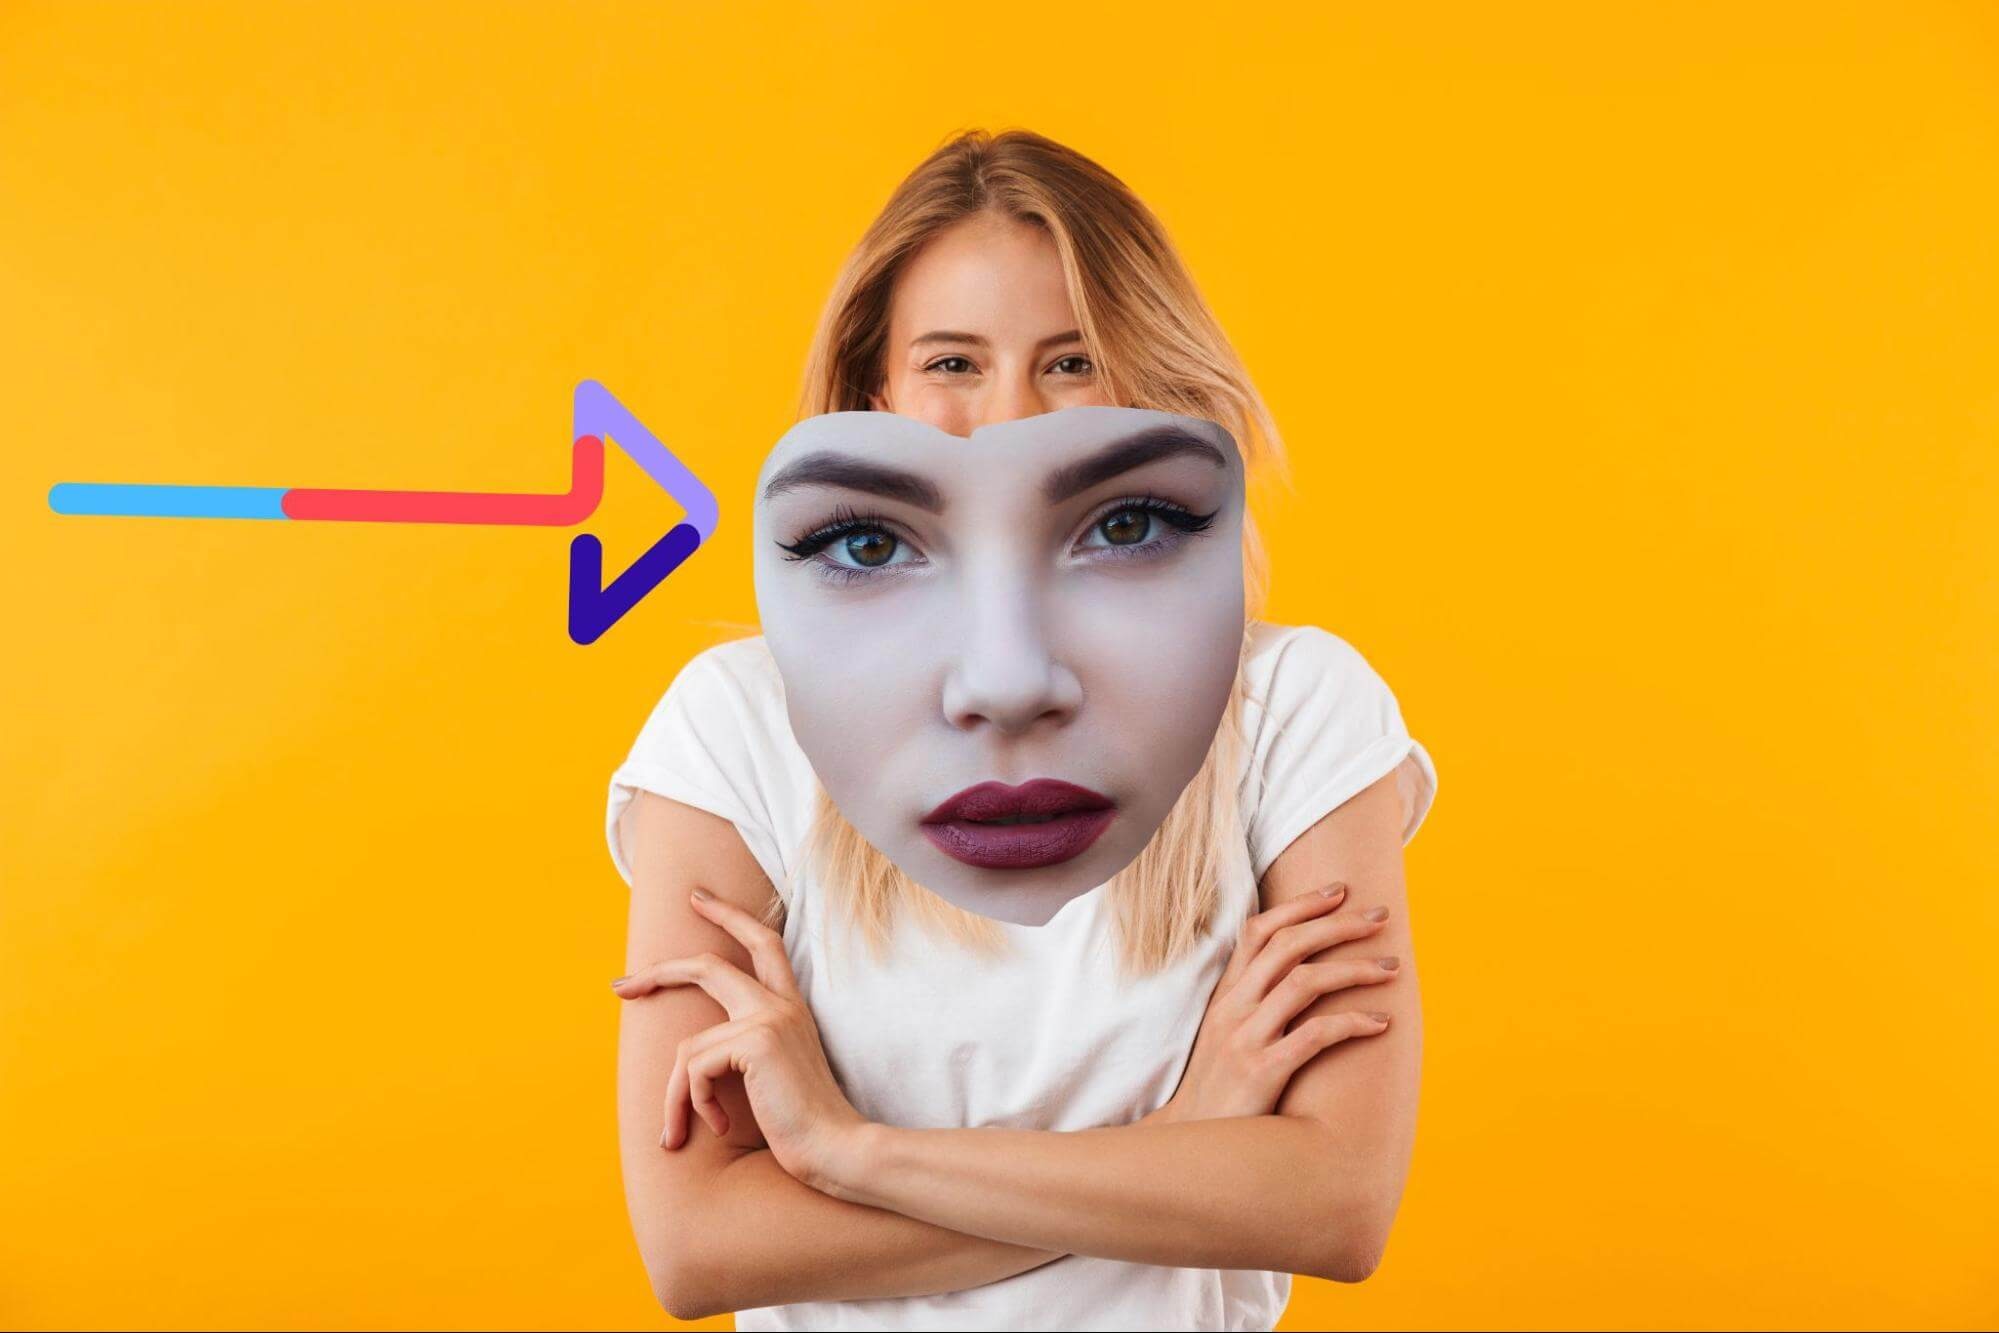
Step 8: Delete the face from the body layer
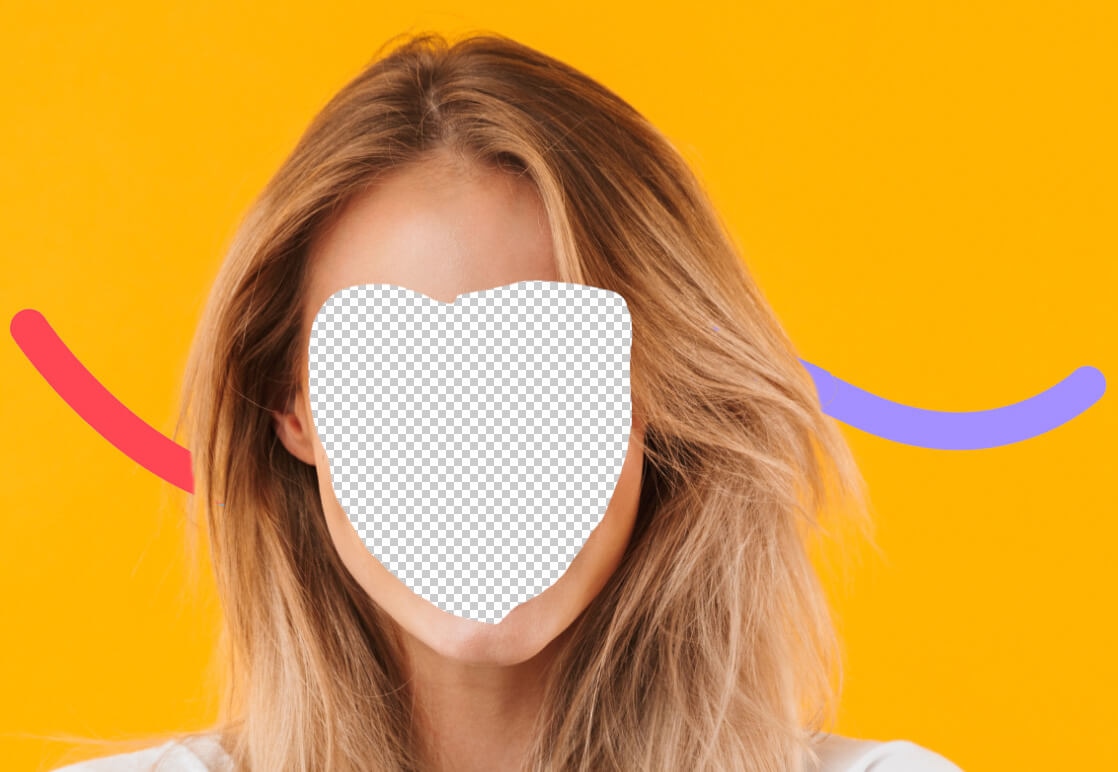
With the Body layer still selected, press BACKSPACE (DELETE on Mac) to remove the area beneath the face.
Press CTRL+D (COMMAND+D on Mac) to deselect.
Your image should look something like this. Horrifying, yes. But we’ll be fixing it in just a moment.
Step 9: Blend everything together
Click on the eye icon next to the Face layer to toggle visibility on. You should see both the face and the body again.
Still in your Layers panel, select the Face and Body layers at the same time by holding down the SHIFT key.
Go to the dropdown menu at the top of the screen and choose Edit > Auto-Blend Layers….
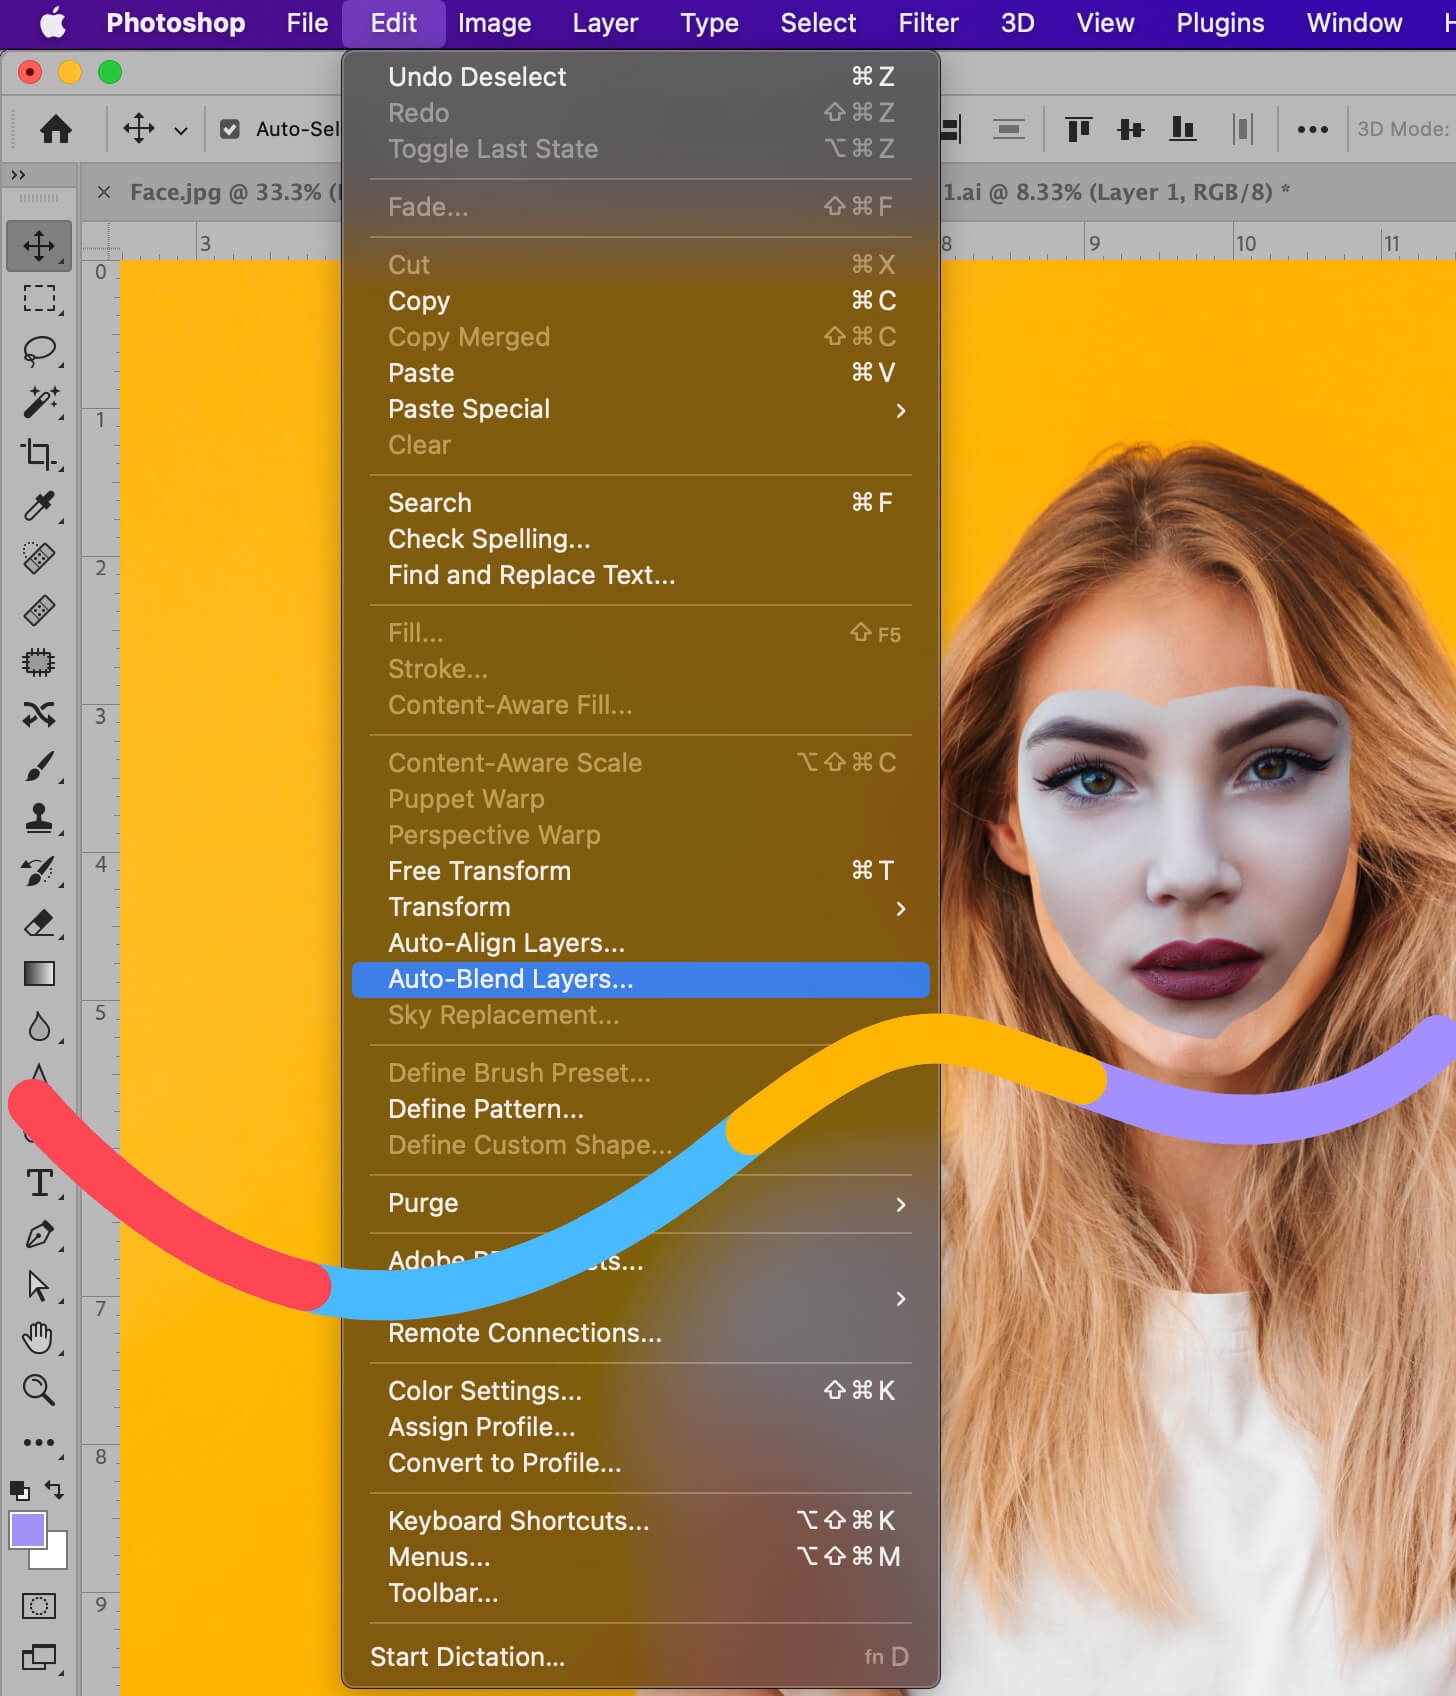
In the pop-up window that appears, Select Panorama and check the box for Seamless Tones and Colors and Content Aware Fill Transparent Areas.
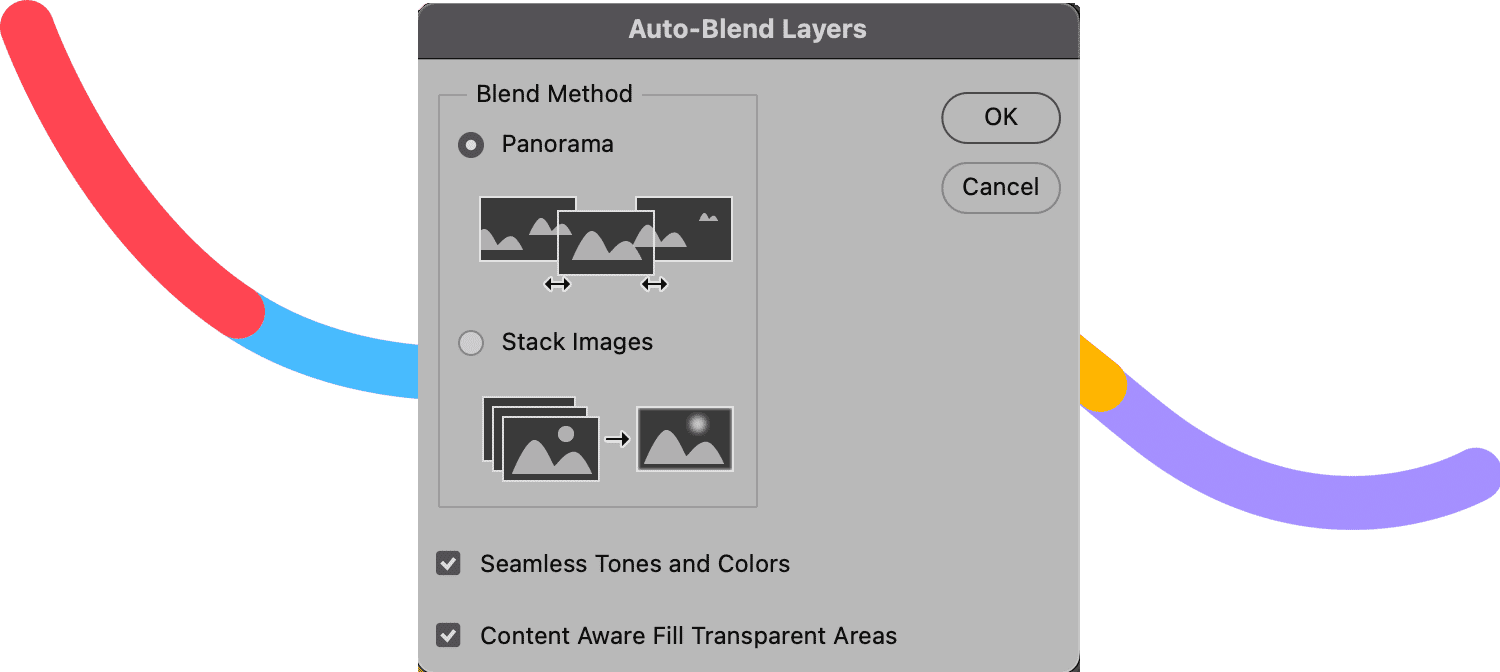
Click OK.
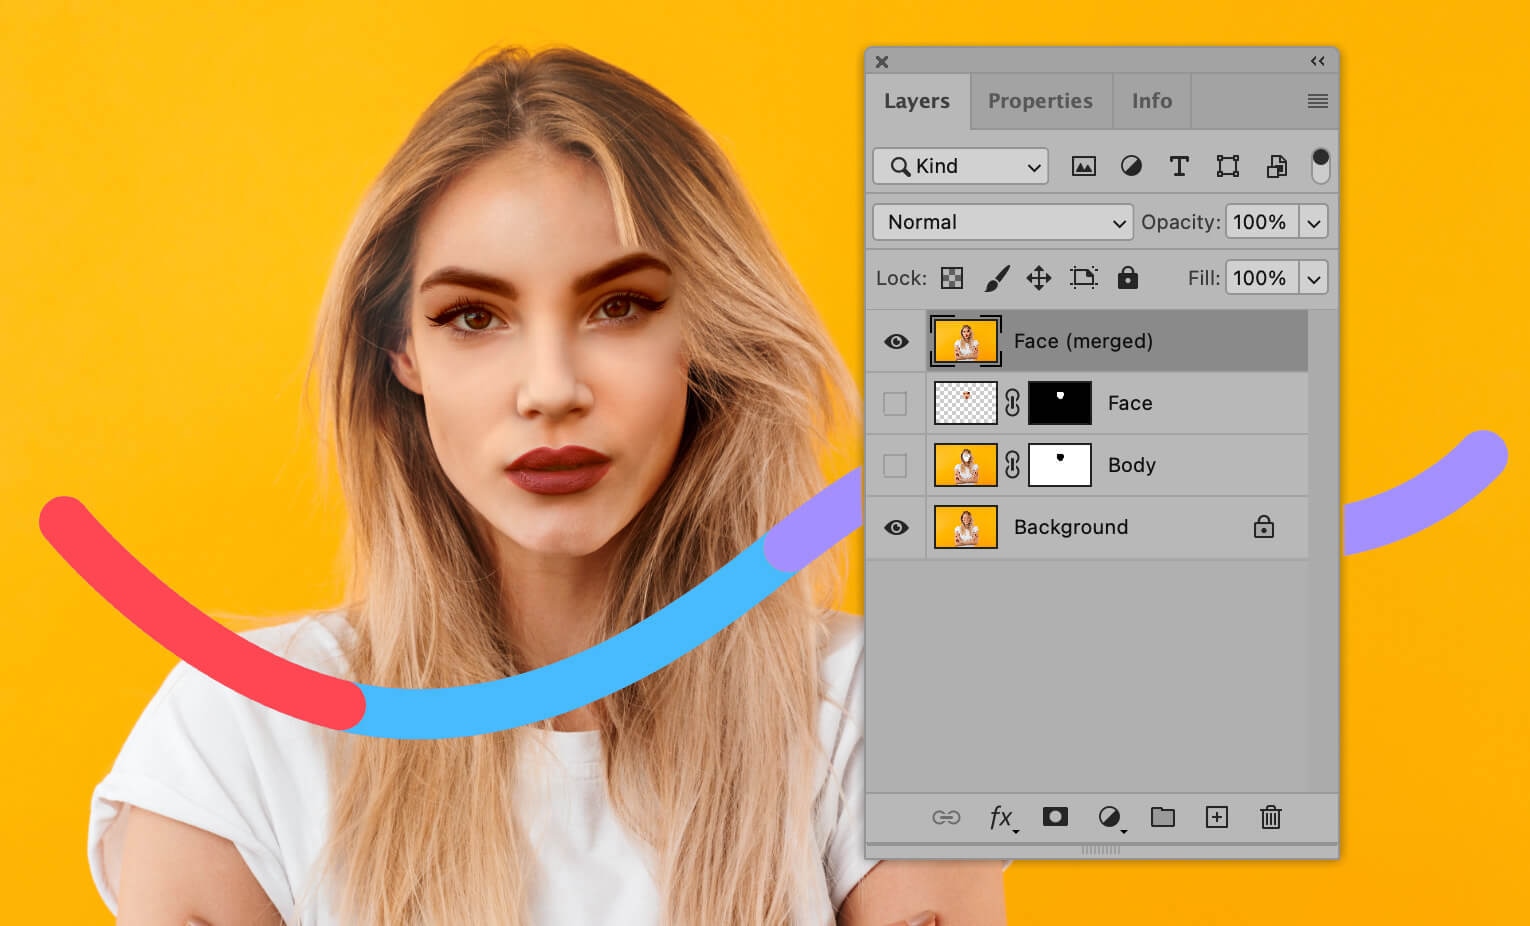
You’ll now have a new, merged layer with the two faces merged together.

Step 10: Perform touch-ups (if necessary)
You may be done at this point! But for this example, the original model’s hair is covered up in places by the new model’s face.
To fix this and similar issues, toggle the visibility of the original layer back on by selecting the eye icon next to the Background layer.
Then, toggle off the visibility of any layers existing between the new merged layer and the original background layer.
In your new, merged layer, select the Eraser tool.
Carefully erase any areas of the new model’s face to reveal the original layer beneath. Work carefully, and use a small brush with 0% hardness for best results.
Once you’re satisfied with the results, remember to save your image.

Congratulations! You now know how to Photoshop a face onto another body, and you’re ready to use this image to enhance your ecommerce photos.
FAQs about Photoshop face swap
How do you Photoshop a face onto another body for free?
You can’t really Photoshop a face onto another body for free because Adobe charges a fee to use its photo-editing software. If you outsource the Photoshop face swap, you’ll also have to pay for the services.
Can you swap heads in Photoshop?
Yes, you can swap heads in Photoshop. You can use the steps in this tutorial to swap faces and apply the same techniques to the whole head.
How do you put a face on another body without Photoshop?
- Open image files in Photoshop
- Select the second model’s face
- Copy and paste the second model’s face
- Resize the face
- Duplicate your Background Layer
- Make a selection in the Body layer
- Create a slight overlap of the face with the body
- Delete the face from the body layer
- Blend everything together
- Perform touch-ups (if necessary)