Photoshop Tutorial: A Beginner’s Guide to Using Layers
If you’re editing lots of product photos, you’ll want to learn how to effectively use Layers in Photoshop. We’ll show you the ropes.
By

Understanding how to use Layers in Photoshop is essential to streamlining your photo-editing process and making sure you have the highest-quality images possible.
But if you’re first starting out with using Layers in Photoshop, or you’re reacclimating yourself to the program after some time apart, it can be confusing to get started.
That’s why we created this Photoshop Layers for beginners guide to help you get started.
What are Layers in Photoshop?
Using Layers in Photoshop allow you to add new elements to an image without altering the original image. With Layers, you can place text, additional images, shapes and even vector graphics into your Photoshop document while maintaining the ability to move, delete or adjust those elements individually without affecting one another.
Using Layers is a good policy whenever you need to modify an existing image; by working in Layers, you can maintain the integrity of your original image until you’re satisfied with your changes.
Many creative professionals keep a layered version of their Photoshop image that they can return to and edit later, as well as a flattened version of the modified image to use on ecommerce sites.
How do Layers work in Photoshop?
Layers act like sheets of transparent film placed on top of one another. Objects on the top Layer will appear on top of objects on lower Layers. If you apply a solid color to a Layer, that color will block out any objects on Layers beneath it.
Layers are accessed, modified, created and deleted through the Layers panel in Photoshop.
In this Photoshop Layers tutorial, we’ll go over the following:
- The Layers panel
- Adding a new Layer
- Selecting Layers
- Pasting a photo into a new Layer
- Deleting a Layer
- Duplicating a Layer
- Showing and hiding Layers
- Locking and unlocking Layers
The Layers panel
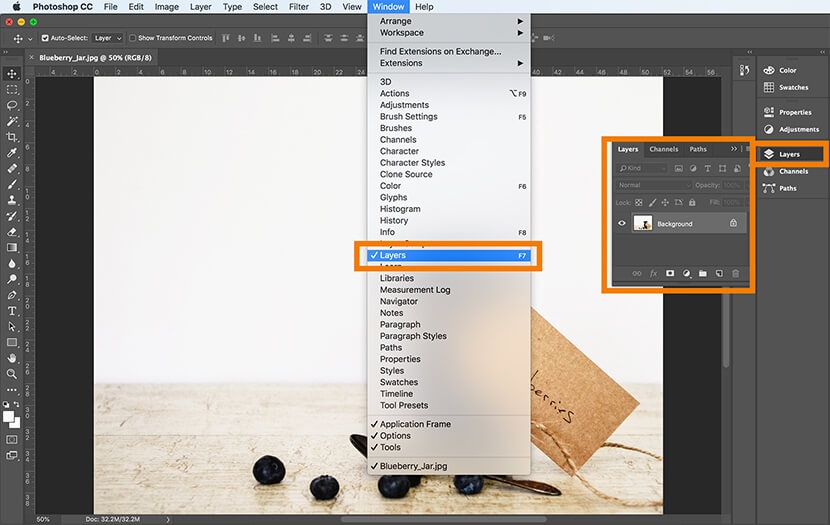
In the default workspace, the Layers panel sits on the right-hand side of the Photoshop window. Click on the word Layers to access it.
If you can’t find the Layers panel when you open Photoshop, you can easily access it by clicking on the Window drop-down menu at the top of the application window and selecting Layers. When Layers is checked, the panel will pop up your screen.
Adding a new Layer
There are several ways to create a new Layer in Photoshop. The quickest method is to type SHIFT+CTRL+N (SHIFT+COMMAND+N on a Mac) to automatically create a new Layer on top of any existing Layers in your document.
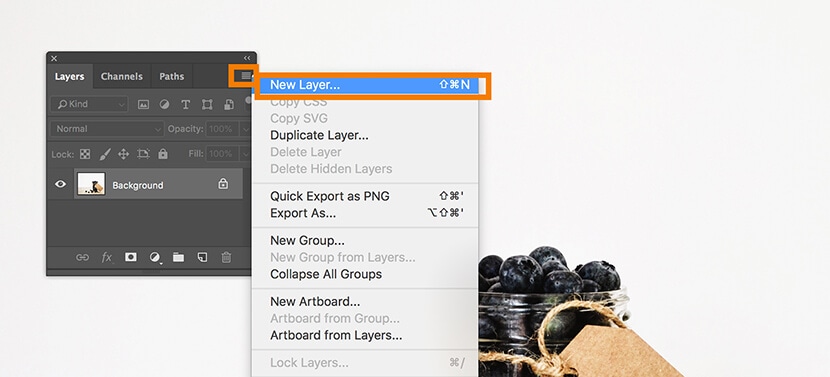
You can also create a new Layer by clicking on the Layers panel menu (which looks like four horizontal lines on the right-hand side of the panel) and selecting New Layer.
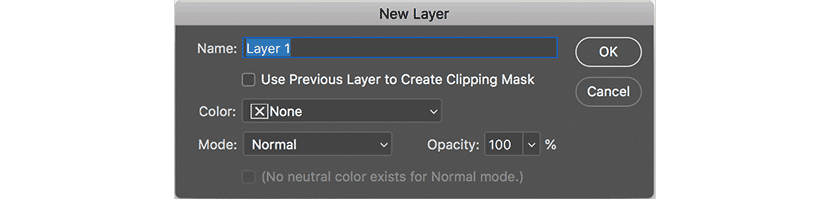
A dialog box will pop up with options for the new Layer you’re about to create. You can change each of these options afterwards, so it’s fine to leave everything as is and click OK.
Once you’ve created a new Layer, you can add an object to it or draw in it without affecting the background.
Selecting Layers
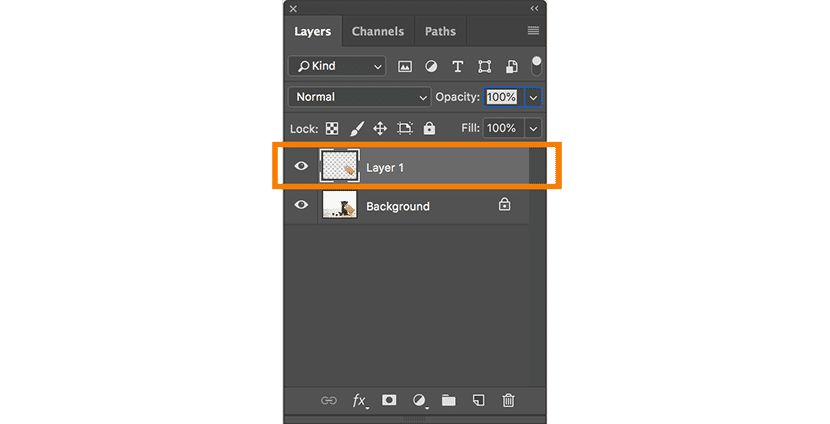
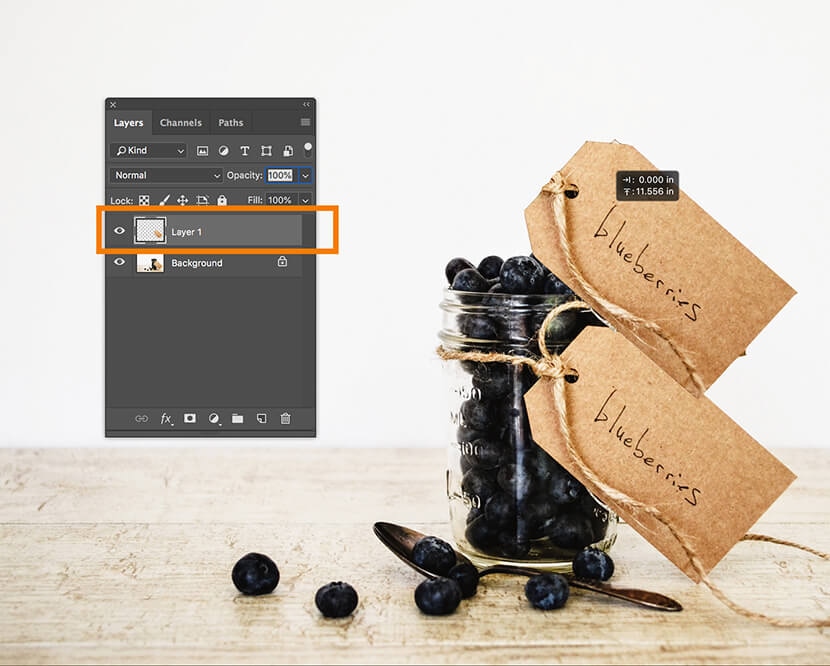
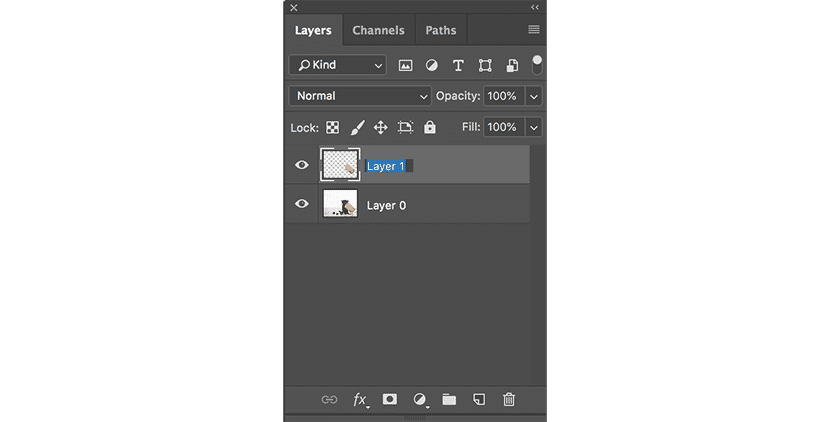
A Layer is selected when that Layer is highlighted in your Layers panel. To select a Layer, click on that Layer in the panel with your mouse. In the image below, Layer 1 is selected, and the Background Layer is not.
Pasting a photo into a new Layer
When you copy and paste an image from one document to another, the image will automatically appear in a new Layer.
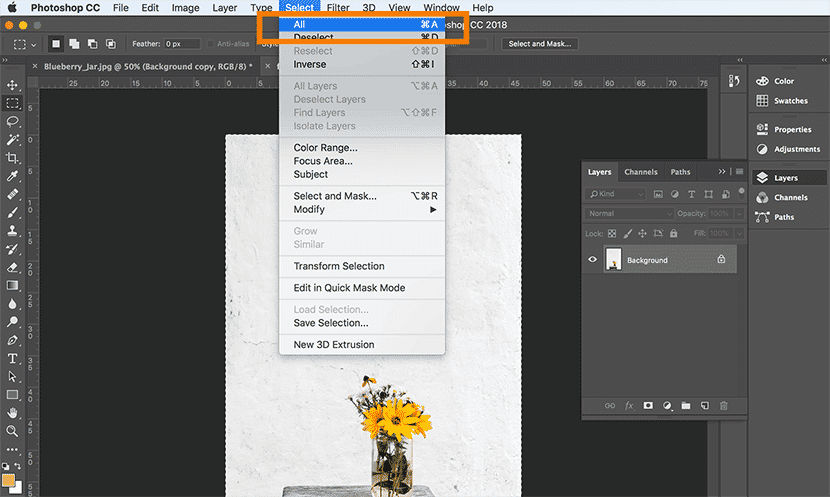
To paste one image into another, go into the document with the image you want to copy, and make sure the Layer containing the image is selected (if there is only one Layer, this will be the Background layer). Click on Select > All or type CTRL+A (COMMAND+A on a Mac) to select the entire image.
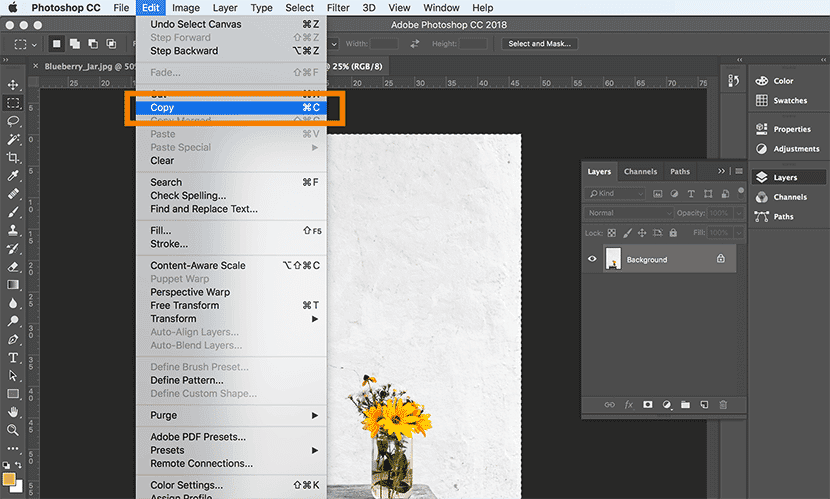
Copy the image by going to File > Copy, or typing CTRL+C (COMMAND+C on a Mac).
Go into the second file, where you want to paste the image, and click Edit > Paste or type CTRL+V (COMMAND+V on a Mac).
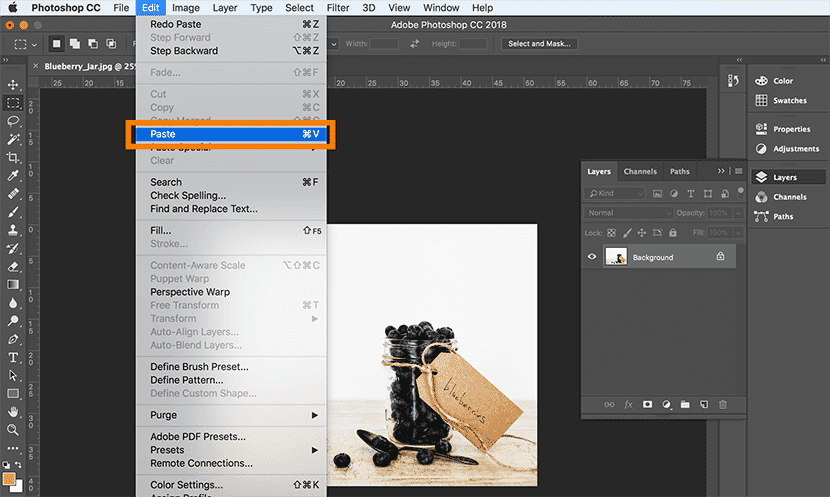
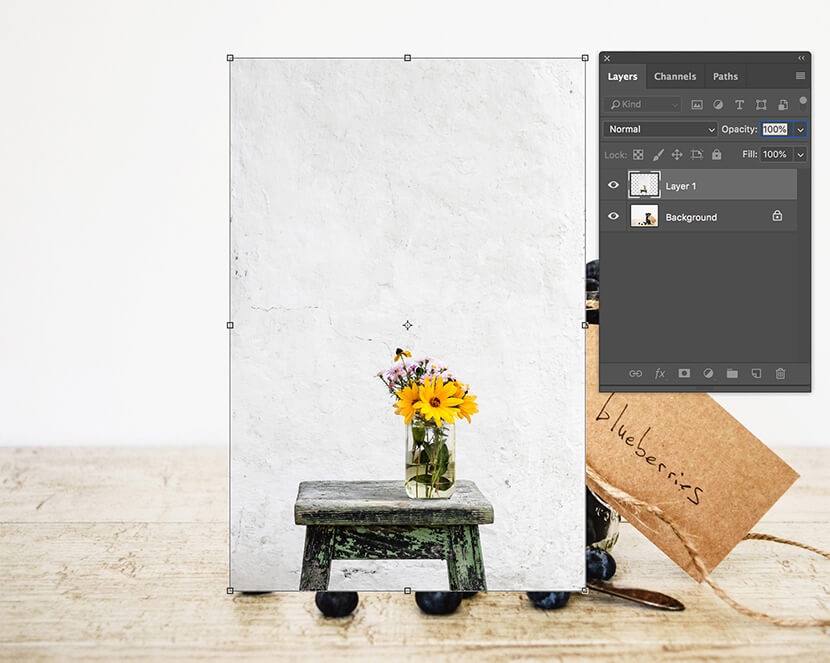
The image will automatically appear as a new Layer in your Photoshop document.
You can also paste a portion of your image into a new Layer. To do this, use one of the selection tools (Marquee Tools, Magic Wand Tool, or Lasso Tools) to select a portion of your image.
Make sure the Background Layer (or Layer containing your image) is selected in the Layers panel. Then right-click on your image (CTRL+click on a Mac). From the resulting menu, click on Layer Via Copy.

Your selection will appear as a new Layer in your document. From here, you can move or modify the copied image portion without affecting the background.
Deleting a Layer in Photoshop
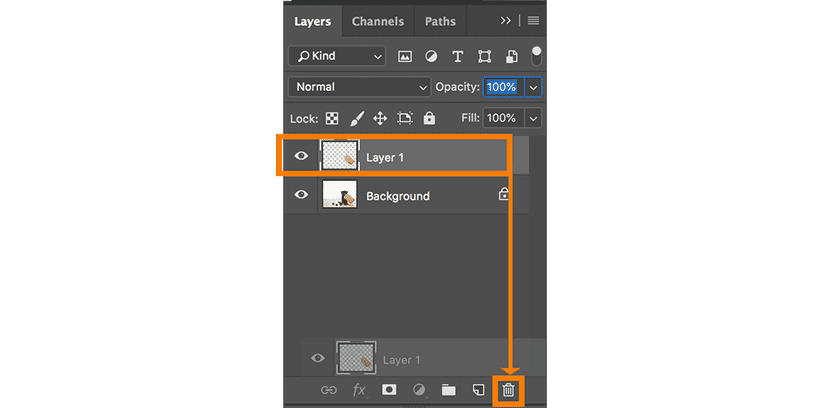
To delete a Layer in Photoshop, click and hold on the Layer in the Layer panel, and drag the Layer to the trash icon in the lower right-hand corner of the panel.
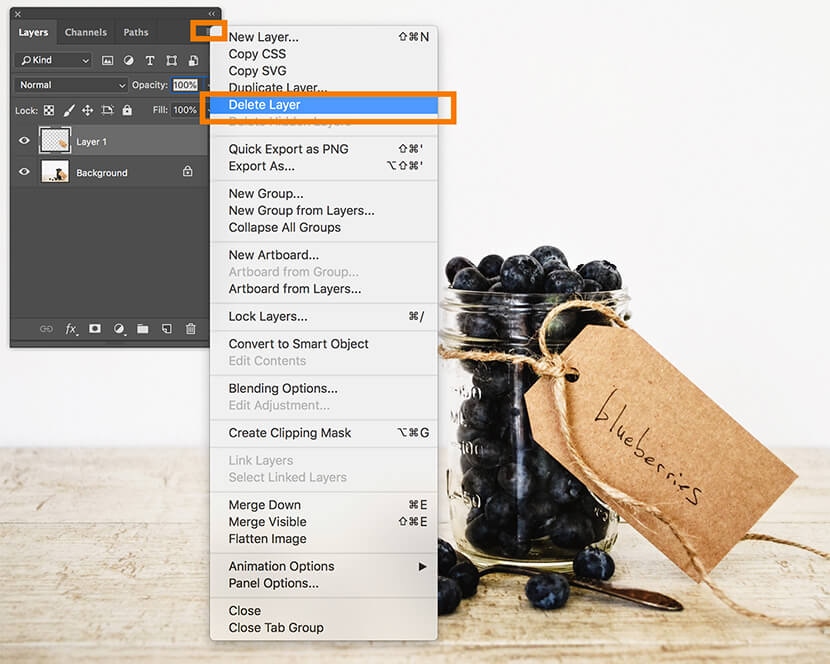
You can also delete a Layer by selecting the Layer in the Layer panel and then selecting Delete Layer from the panel menu.
A dialog box will pop up asking if you’re sure you want to delete the Layer. Click OK to confirm.
Duplicating a Layer
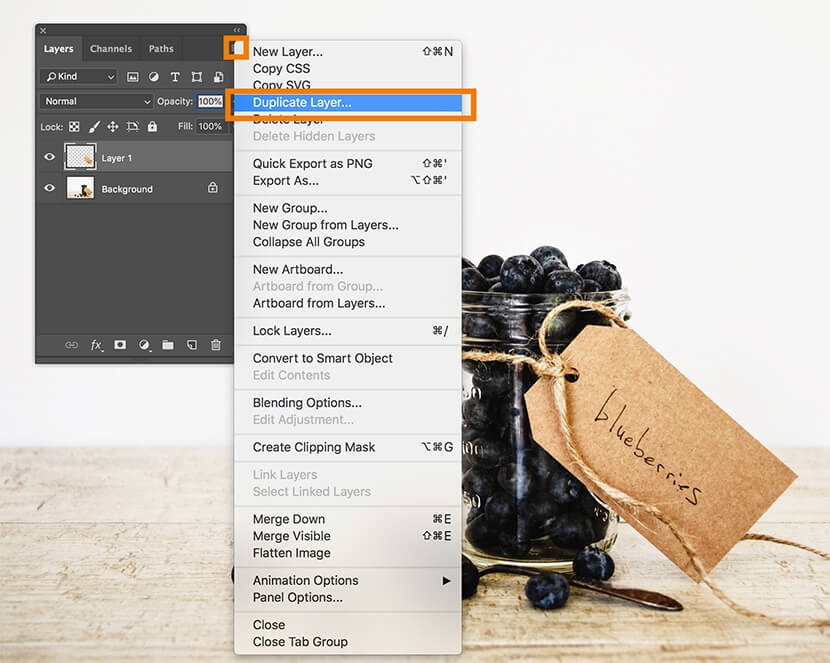
Select the Layer you want to duplicate and then click on the Layers panel menu. Choose Duplicate Layer.
A dialog box will pop up asking you to name the new Layer. By default, it will auto-populate this with the original Layer’s name followed by the word “copy.”
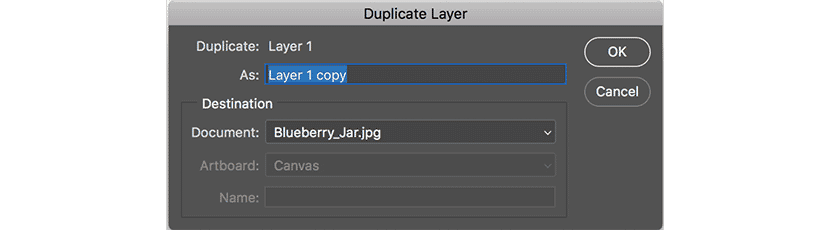
You can also duplicate the Layer into another document that’s currently open, or into a new document in Photoshop by choosing from the drop-down location next to Document (in the Destination section).

Showing and hiding Layers
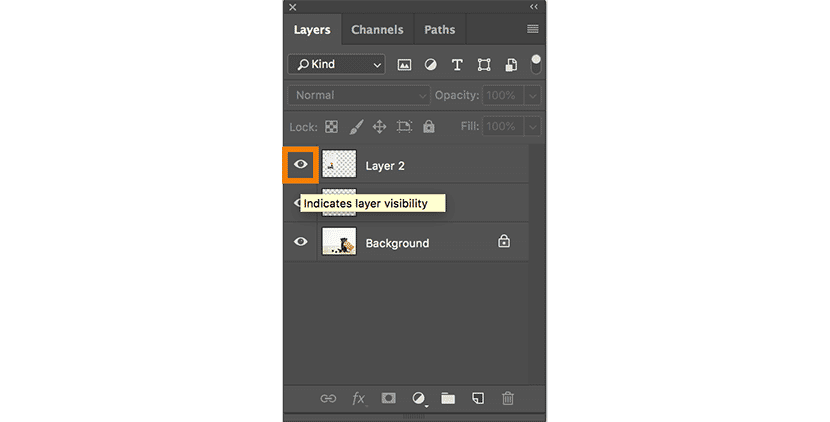
Toggle the visibility of a Layer on and off by clicking on the eye icon next to the Layer name in the Layers panel. If you see the eye icon, the Layer is visible. Click on the eye to make it disappear, and the Layer becomes invisible.
Locking and unlocking Layers
By default, all new Layers are unlocked when created, and the Background Layer is locked.
To unlock the Background Layer, double click on the Layer in the Layers panel. The New Layer window will pop up, this time with the Layer name set to Layer 0. Click OK.

The Background Layer will now appear as an unlocked Layer renamed to Layer 0.
To lock an unlocked Layer, select the Layer you want to lock in the Layers panel. Then, click on the padlock icon just above the list of Layers in the panel.
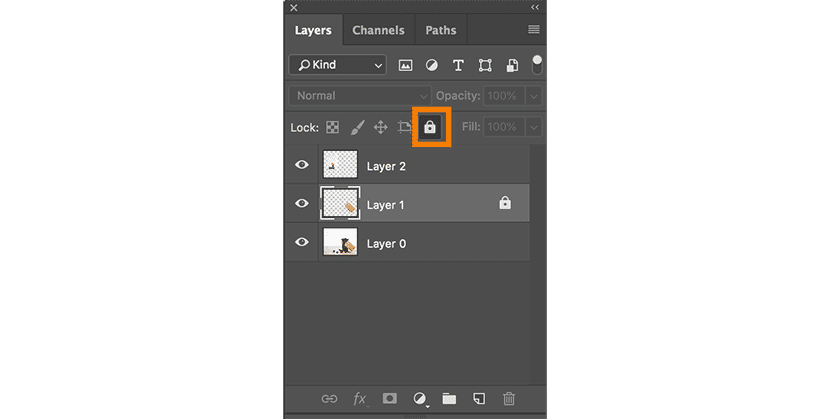
To unlock the Layer, click on the padlock icon once more.
Using Layers in Photoshop: Organization tips
Once you begin really using Layers in Photoshop, you’ll need some tricks to keep them organized and to edit them together (or separately).
For this Photoshop Layers tutorial, we’ll look at:
- Naming Layers
- Reordering Layers
- Coding Layers with color
- Linking Layers
- Creating Layer groups
- Flattening Layers
- Merging Layers
- Stamping Layers
Naming Layers
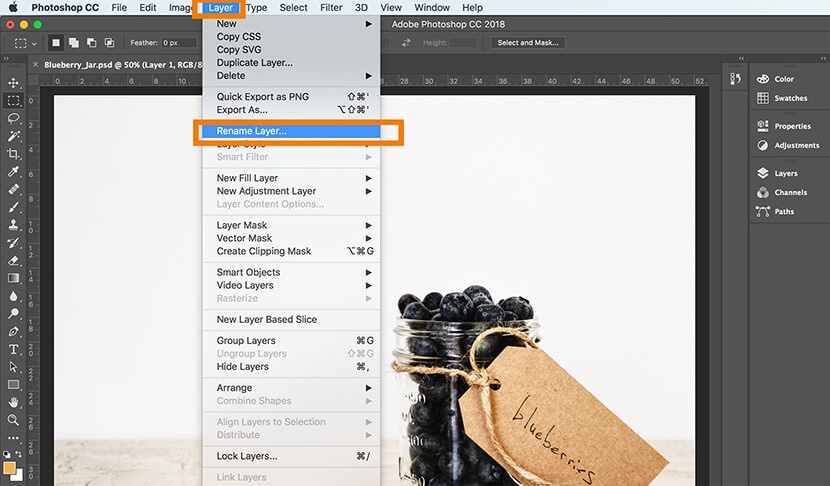
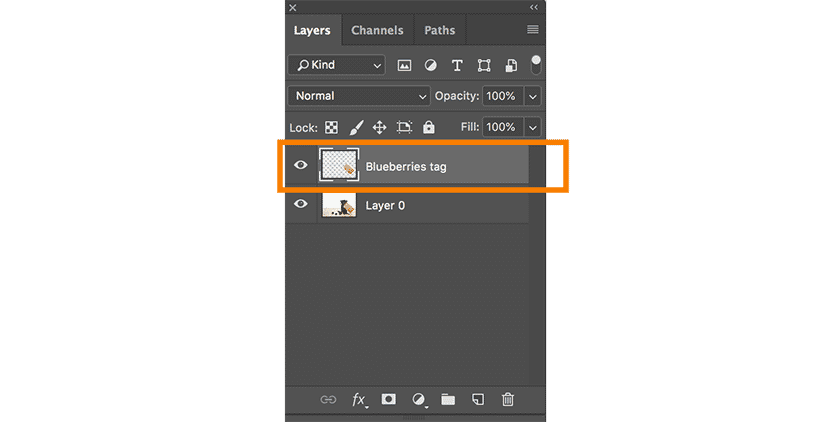
To give your Layer a custom name, select the Layer you want to rename in your Layers panel. Then choose Rename Layer from the Layers drop-down menu at the top of the application window.
You can also click on the existing name of the Layer within the Layers panel until the text becomes editable.
Overwrite the existing Layer name by typing in the new Layer name.
Reordering Layers
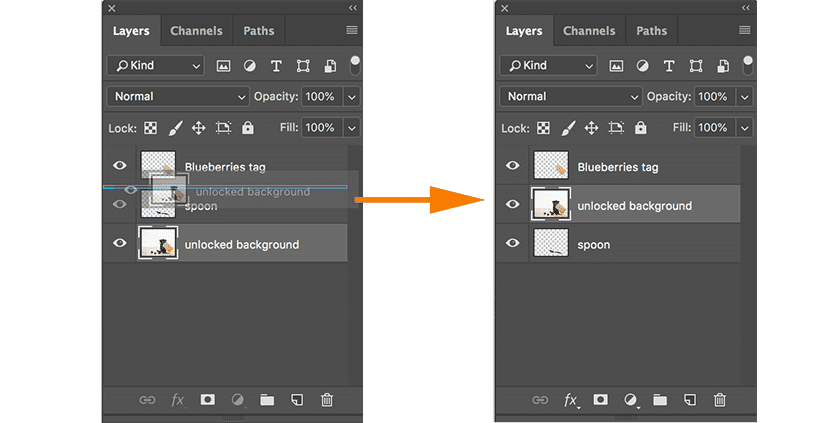
To shift the order of Layers, select the Layer you wish to move in the Layers panel by clicking and dragging the Layer to its new destination. A small blue box will appear, indicating where the Layer will now be located. Release the mouse button to complete the Layer reorder.
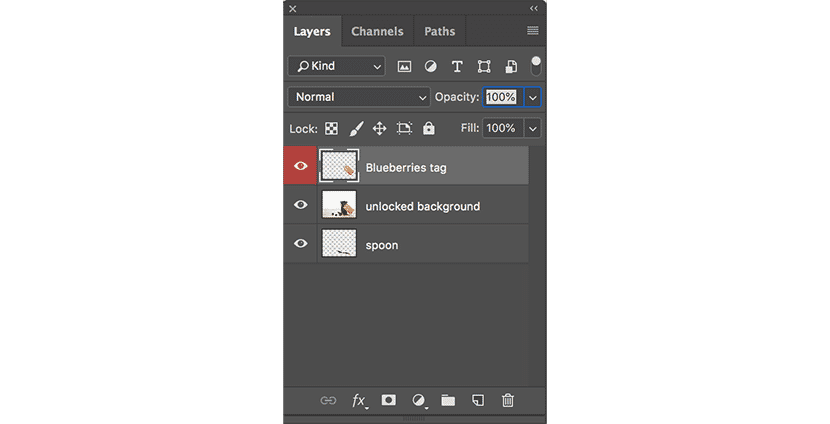
Coding Layers with color
If you have a document with many Layers, you can add color codes to certain Layers to help them stand out from the other Layers.
To apply a color code to a Layer, select the Layer you want to tag and right click (CTRL+click on a Mac). A drop-down menu will appear with color selections at the bottom. Click on the color code you want to apply to the Layer.
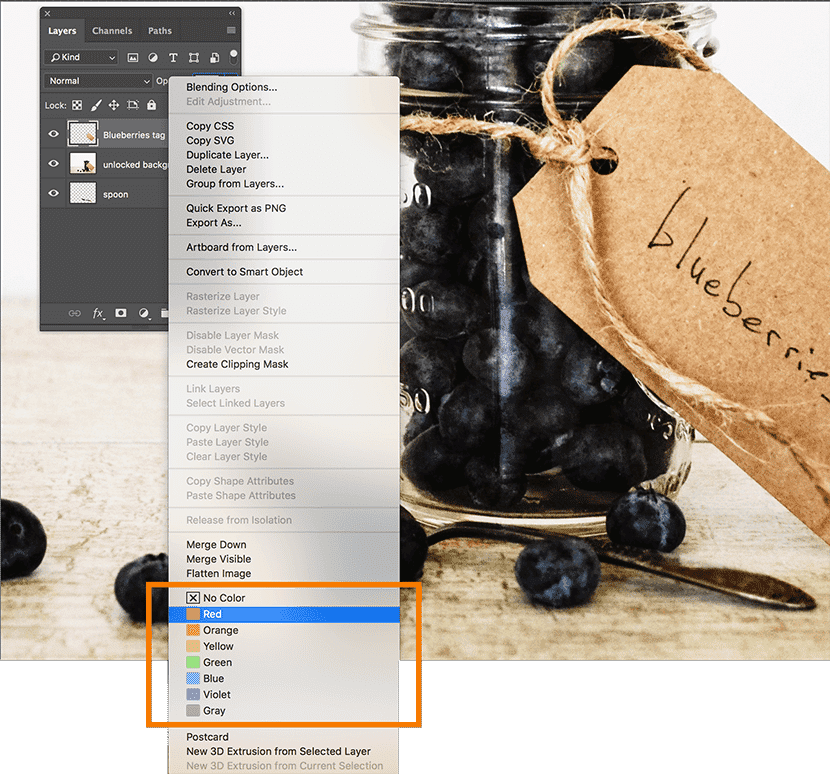
Note that adding a color to a Layer in this manner won’t actually visibly change the content of the Layer. In other words, all colors in your image will remain the same. Adding a Layer color code only adds a color to the square next to the layer’s icon in your Layers panel.
Linking Layers
By default, Layers don’t affect one another. But you can link Layers together so that, when you move or transform the items in one Layer, the items in linked Layers will move or transform the same way.
For example, if a product image and its shadow are in two different layers, you can link those layers together to make sure that the shadow moves with the product as you reposition or scale it within your document. Check out our tutorial on how to add drop shadow in Photoshop.
To link Layers, select all the Layers you want to link together. If the Layers are next to each other in the Layers panel, hold down SHIFT to select multiple Layers at the same time. If the Layers you want to link aren’t next to one another, select the first Layer and then CTRL+click (COMMAND+click on a Mac) on the other Layers you wish to select.
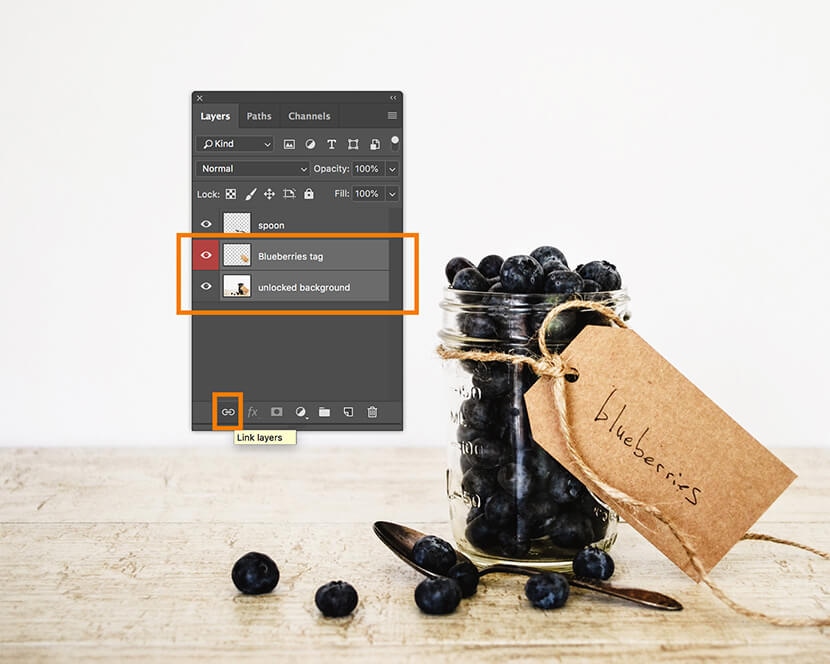
Once you’ve selected your Layers, click the link icon at the bottom of the Layers panel.
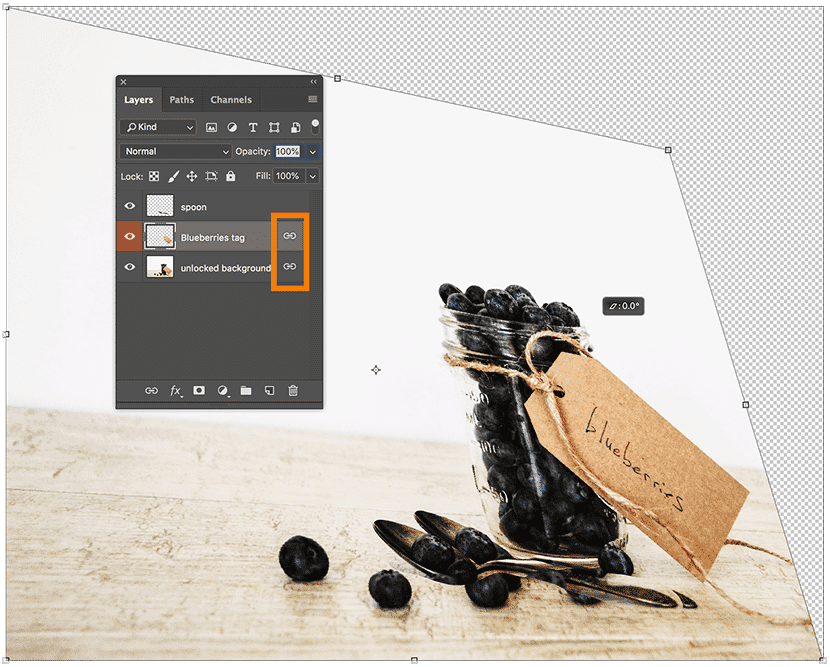
Once your Layers are linked, the link icon will appear next to the Layer name when one of the linked Layers is selected.
Now, if you move or transform one of the linked Layers, the other linked Layers will modify the same way.
To unlink linked Layers, select one of the linked Layers and click on the link icon at the bottom of the panel.
Creating Layer groups
Layer groups are like file folders for your Layers; they help you organize and categorize many Layers together.
Like Layers, Layer groups can be locked, linked or made invisible, affecting all the Layers within.
To create a new group, click on the Layers panel menu on the right-hand side and select New Group….
A dialog box similar to the New Layer dialog box will pop up. Here you can name your new Group or leave its default settings. Click OK.

To add existing Layers to your new group, select the Layers you want to add and drag them into the New Group with your mouse.
You’ll know they’re being moved correctly when you see a blue box appear around the group you’re trying to move the Layers into.
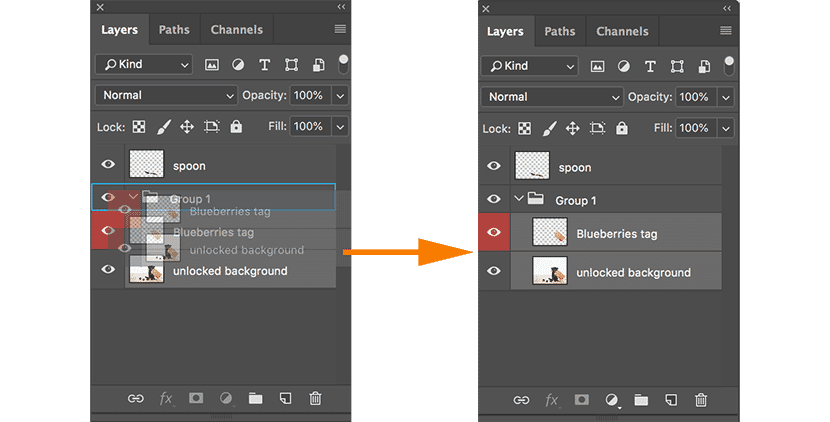
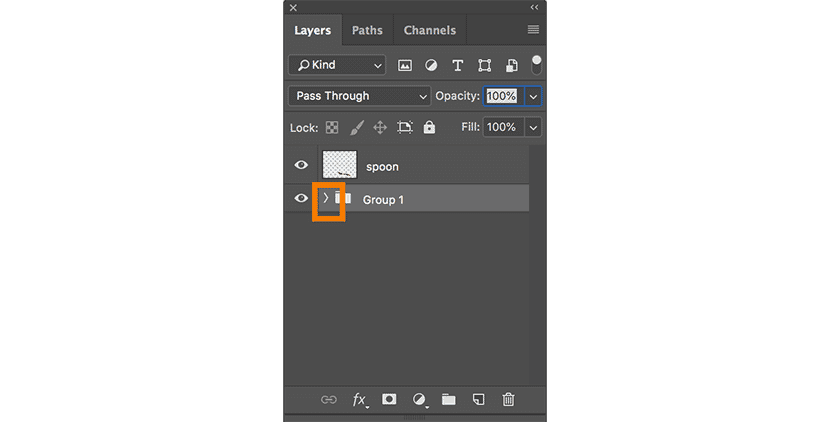
You can click on the arrow icon next to the Group name to collapse or expand the group.
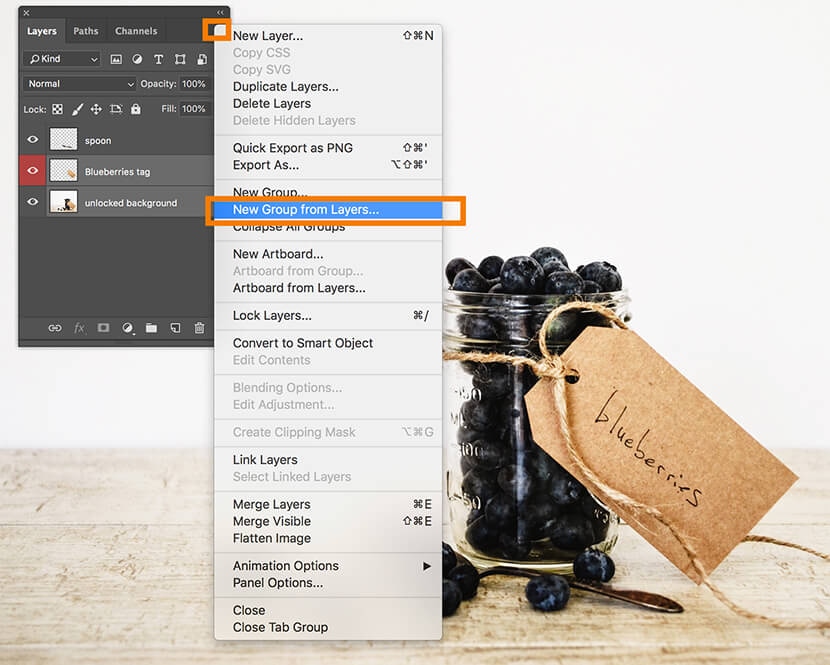
To automatically create a group and place Layers in it at the same time, select the Layers you want to group together. Then, in the Layers panel menu on the right, select New Group from Layers… The same New Group dialog box will pop up. Click OK, and your selected Layers will automatically be placed in your new group.

Flattening Layers
Flattening Layers means you’re converting all your separate Layers into one Layer, removing any individual capabilities you had with each Layer.
To flatten your Layers, choose Flatten Image from the Layers panel menu.

Your distinct Layers will disappear in the Layers panel, replaced with one Layer named Background.
Merging Layers
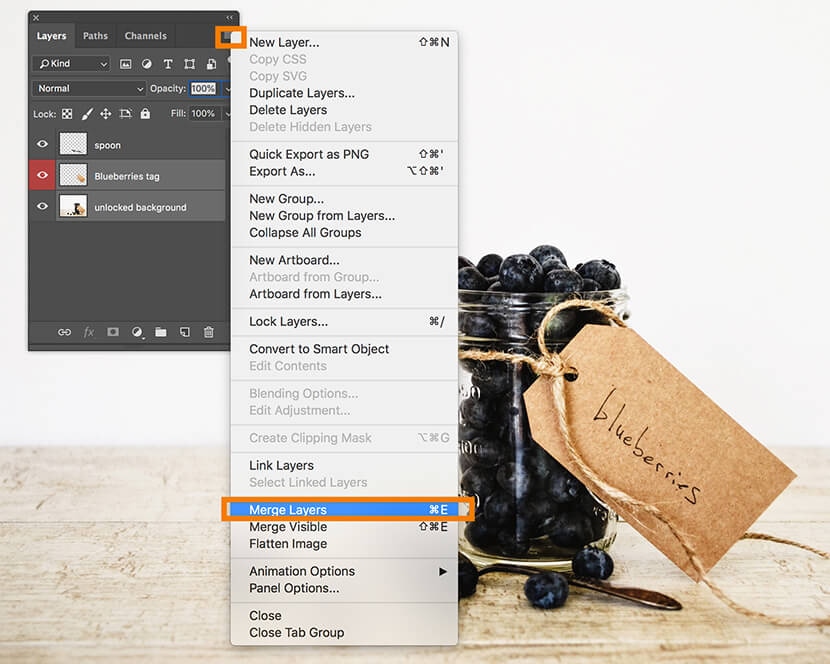
Merging Layers flattens only Layers you specify into one Layer, leaving the other Layers intact. To merge multiple Layers into one Layer, select the Layers you want to merge. Use SHIFT+click to select Layers next to one another, or CTRL+click (COMMAND+click on a Mac) to select Layers that are not next to one another.
From your Layers panel menu, choose Merge Layers, or type CTRL+E (COMMAND+E on a Mac).
From this menu, you can also choose Merge Visible, which merges all visible Layers together (regardless of the Layers you’ve selected) and leaves invisible Layers intact.
Stamping Layers
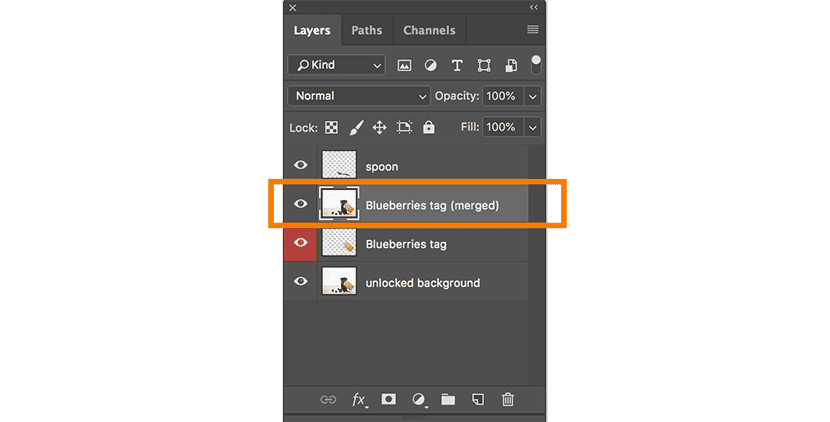
Stamping Layers allows you to create a copy of selected Layers, merged into one Layer. Your original selected Layers remain intact.
First, select the Layers you want to stamp, and type CTRL+A+E (COMMAND+OPTION+E on a Mac).
A new Layer with the combined content will appear above your selected Layers. This is your new stamped Layer.
You can also create a stamped La yer from all visible Layers. To do so, ensure all Layers you want stamped are visible. Then type SHIFT+CTRL+A+E (SHIFT+COMMAND+OPTION+E on a Mac). A new stamped Layer with all your visible content will appear.
How do you adjust Layer transparency and style in Photoshop?
Adjusting opacity of a Layer
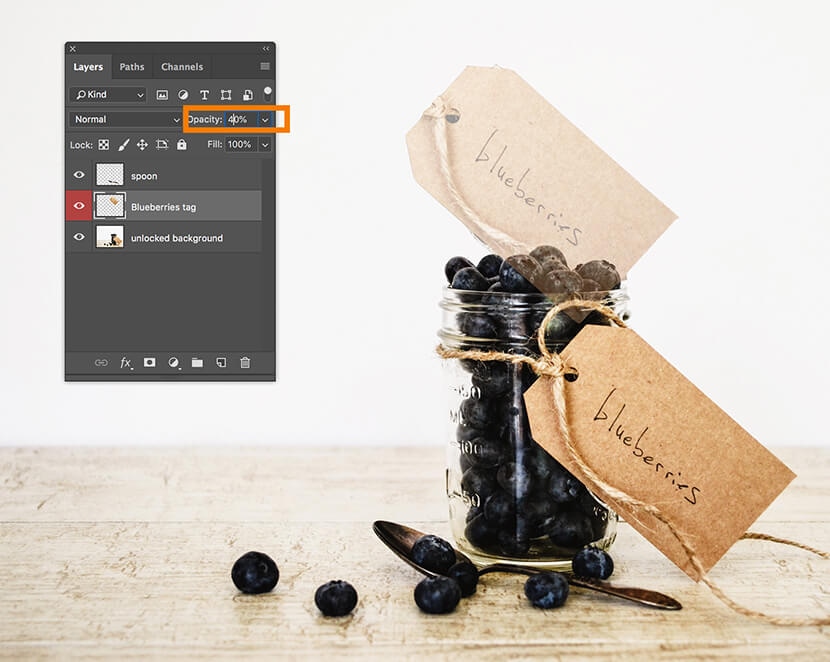
You can adjust how transparent a Layer’s content appears by changing the opacity value in the upper right-hand corner of the Layers panel. This can be helpful if you want to subdue the background and place more focus on the subject (product, model, etc.) of the image.
Select the Layer you want to adjust, and type in a value next to Opacity, or use the drop-down menu next to Opacity to choose a preset value.
You can also adjust the opacity for an entire group by selecting the group in the Layers panel and adjusting the opacity value.
Under Opacity in the Layers panel is an option to adjust the Layer Fill. Fill is slightly different from opacity in that it affects the transparency of a layer’s content without affecting the opacity of Layer Styles. Adjusting a layer’s fill will have the same effects as adjusting a layer’s opacity if you’ve not applied any Layer styles.
Changing Layer blending modes
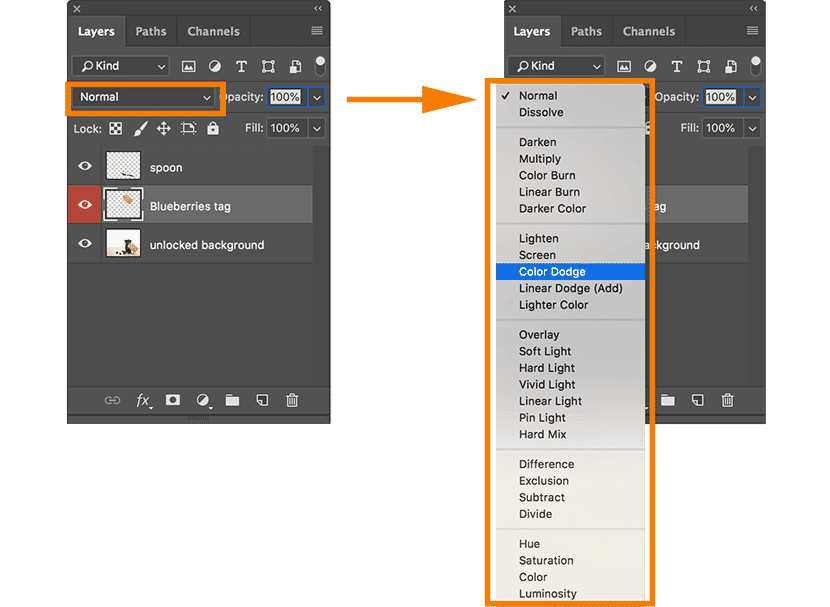
Layer Blend Modes affect the way the Layer interacts with Layers below it. The default Layer Blend Mode is Normal; however, there are 26 additional blend modes you can choose to apply to your Layer.
To change a layer’s Blend Mode, with the Layer selected, click on the drop-down menu just to the left of Opacity.
Applying a Layer Style
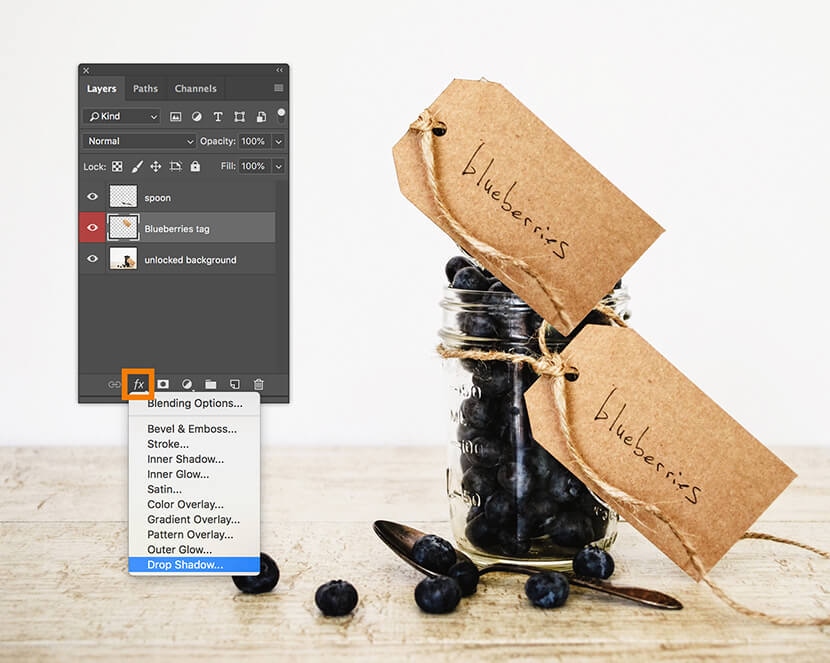
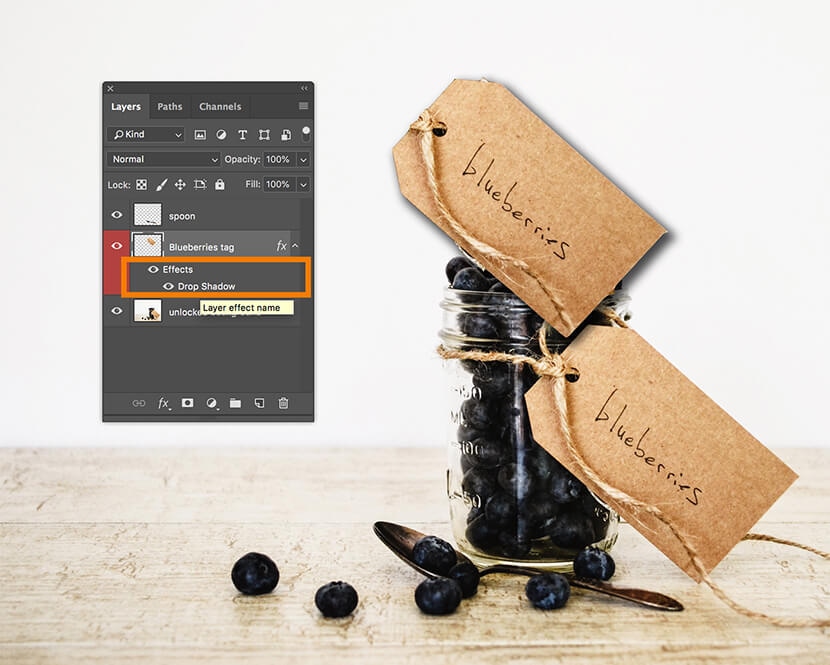
A Layer Style refers to the Layer effect or group of Layer effects added to a Layer or Layer group. You can access the Layer Style options within the Layers panel.
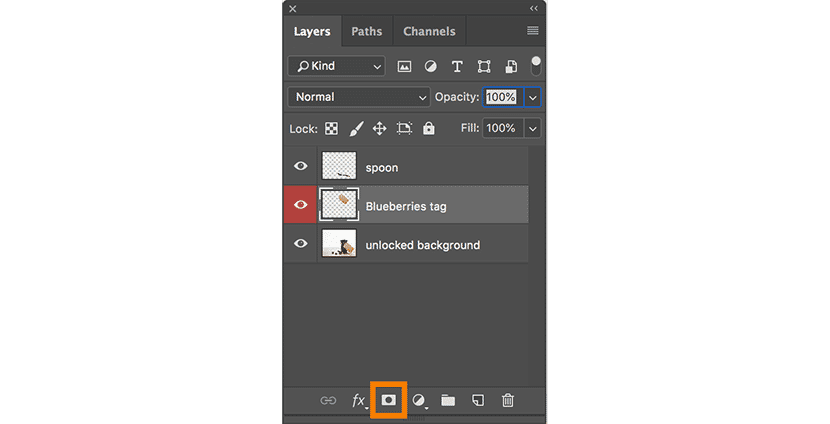
At the bottom of the panel, just to the left of the link icon, is an fx icon. Clicking on that icon reveals Layer effect options.
(This drop-down also allows you to adjust your layer’s different blend mode with Blending Options.)
When you select a Layer effect from the drop-down menu, a dialog box appears giving you the options to fine-tune the Layer Style before it’s applied.
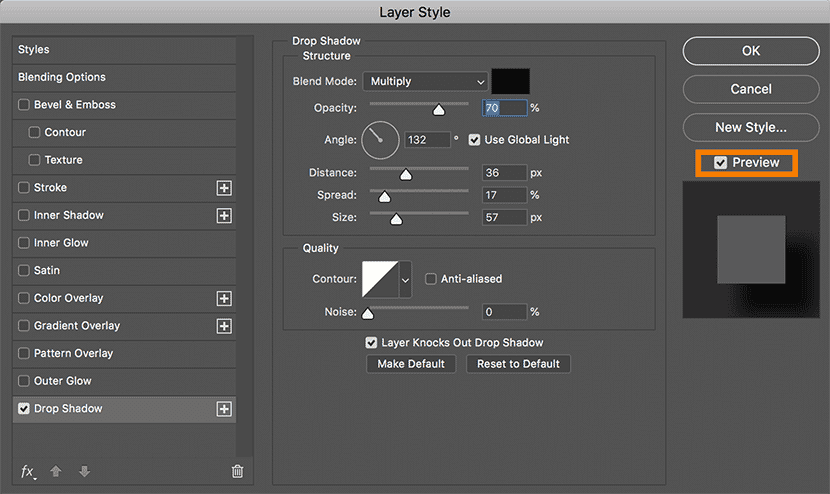
Within this dialog box, you also have the option to apply other effects or change the blending options as well. Keep the Preview option checked to see your adjustments to your Layer in real time before you apply them.
Click OK once you’re ready to apply the style.
You can also adjust Layer effects after they’re applied by double-clicking on the Layer effect name under the Layer name in the Layers panel.
The same Layer Style dialog box will reappear. Make your adjustments, add or remove additional effects, and click OK.
Further exploration: Different types of Layers in Photoshop
As you become more comfortable with Layers, you can start to explore the different Layer types available in Photoshop.
Below, for this Layers tutorial, we’ll quickly look at:
Adjustment Layers
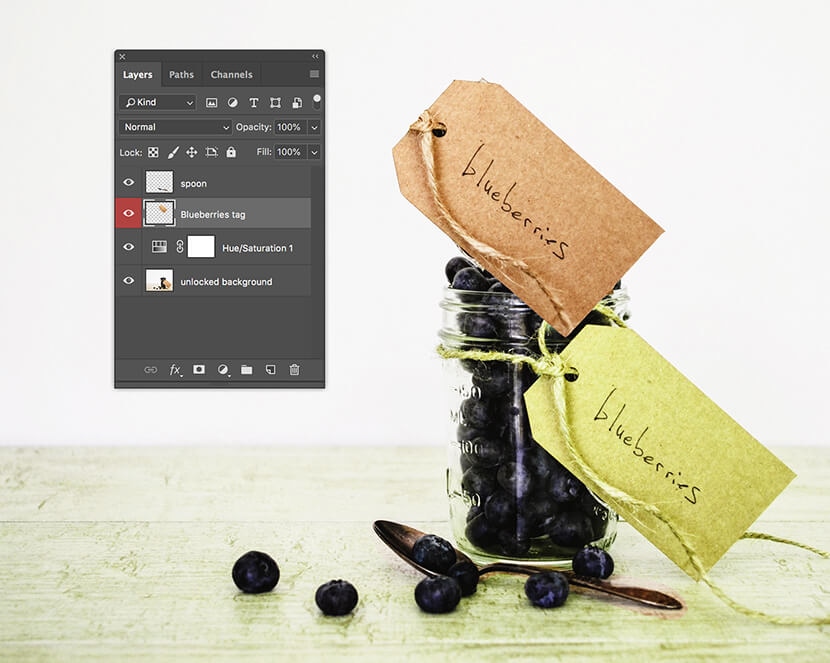
Adjustment Layers allow you to create image adjustments, such as Hue/Saturation or Exposure, and apply to Layers without actually changing the Layer itself.
The below screenshot shows the same image with a Hue/Saturation adjustment Layer inserted above the first Layer.
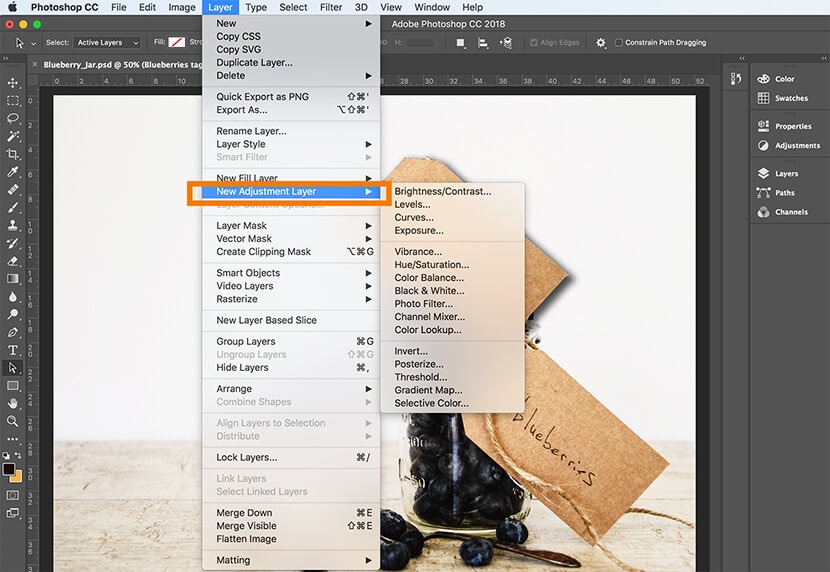
To create an Adjustment Layer, go to the Layers drop-down menu at the top of the application window and select New Adjustment Layer. Then choose the effect you’d like to apply.
Layer Masks
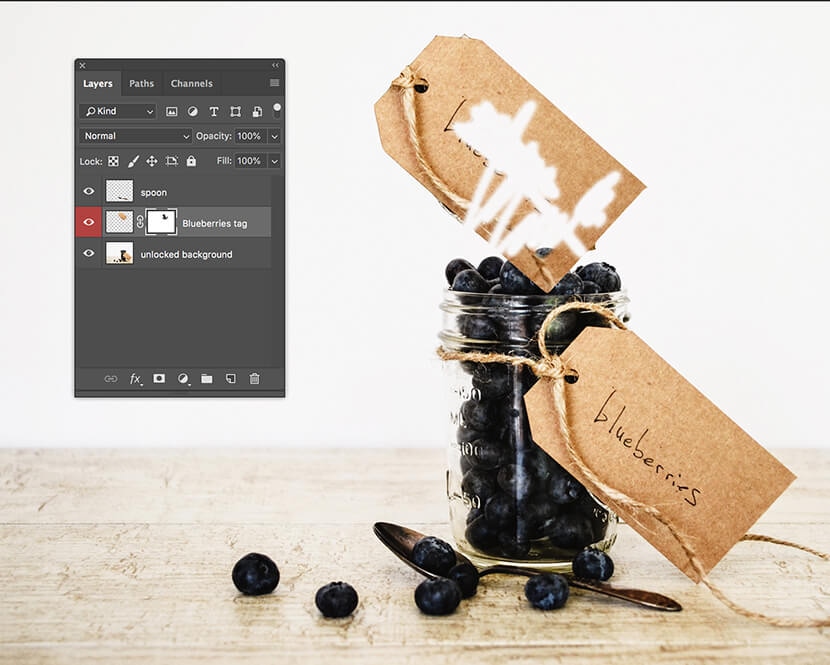
Layer Masks allow you to selectively remove the visibility of a portion of a Layer without permanently erasing any part of the Layer.
The below image has had portions of the second Layer erased within a Layer mask.
To create a Layer Mask, with the Layer selected, click on the Mask icon next to the fx icon at the bottom of the Layers panel.
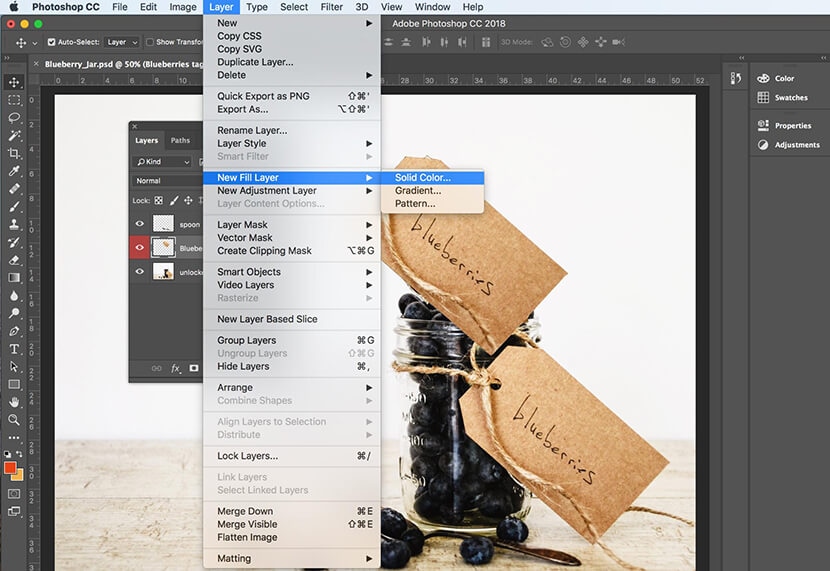
Fill Layers
A Fill Layer adds a new Layer into your Layers panel that’s filled with a solid color, a gradient or a pre-programmed pattern. Like adjustment Layers, Fill Layers don’t permanently alter the content of existing Layers. You can also adjust them after you’ve created them by double clicking on their icon in the Layers panel.
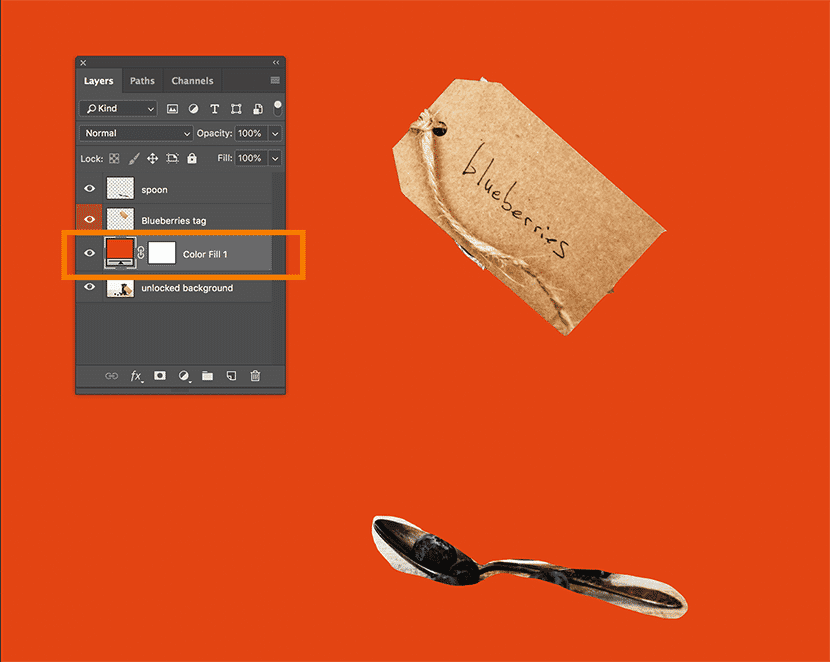
To create a Fill Layer, click on the Layers drop-down menu at the top of the application window and select New Fill Layer, and then choose which type of Layer you wish to create.